lettuces
UC Marin Master Gardeners

Planting & Spacing

How to Plant Your Edible Garden

Image
Planting and harvesting are enjoyable edible garden tasks. Courtesy UC Regents

Take care to plan out your edible garden before diving in. Consider any theme or general approach to your garden, how your plants will be organized, how to invite pollinators, and whether you'll be planting your crops from seeds or starts. Most importantly, be sure you plant at the correct time. Here's how to manage it all. 

APPROACH: Getting started

There are many ways to grow edibles, whether incorporated in the ornamental landscape or in a separate area of the garden. 

Edible landscape 
Use edibles in place of ornamentals in your landscape or integrate them within existing ornamentals. Blueberries and artichokes are beautiful ornamental shrubs. Blackberries, asparagus and raspberries make a nice hedgerow. Herbs make a lovely border.

Theme gardens
Edible flowers, ratatouille or salad niçoise garden, tea or salsa garden, etc. 

Planting space & relative square foot value 
If space is tight: High-yield per square foot plants
Herbs, parsley, carrots, and beets provide the greatest yield per square foot. In other words, you get the most produce from the smallest amount of space. If space is tight, these edibles are good choices.

If space is not an issue: Low-yield per square foot plants
Winter squash, sweet corn, watermelon. and pumpkin have the least yield per square foot. Grow these if space is not an issue or if you don't mind edible vines creeping through your ornamental beds. 

Others crops are somewhere in between. 

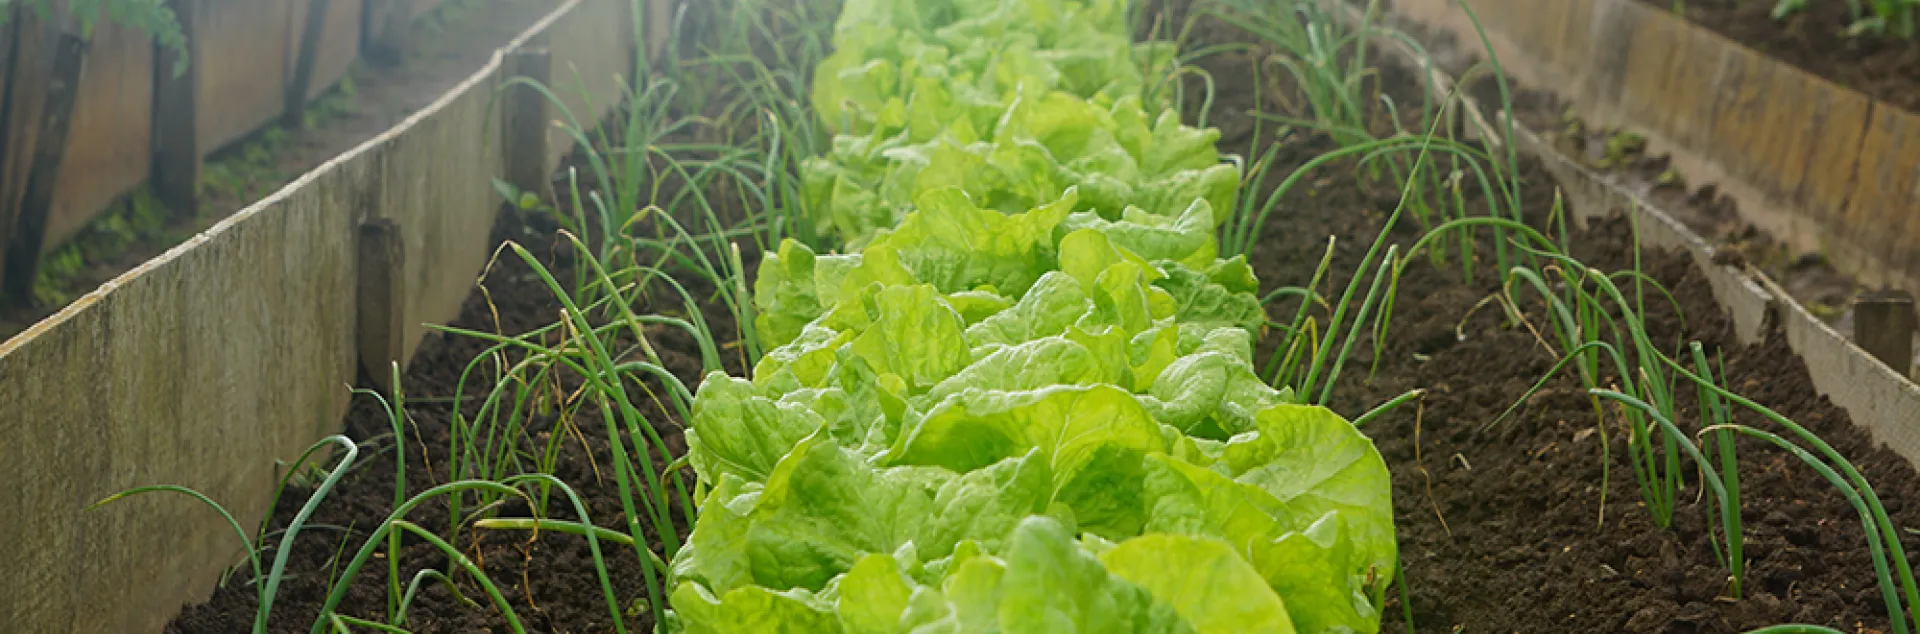
GROUPING PLANTS: How to organize your edible garden

Use the guidelines below to create a planting plan for your edible garden. 

MOST IMPORTANT: Hydrozones and plant spacing

sample-garden-plan-spring

Hydrozones
Place edibles with similar water needs together. Plants with similar root depth have similar water requirements. 
Most edible plants are shallow rooting (approximately 12 inches or less). Examples include lettuce, arugula, basil, chives, garlic, kale, mustard greens, and some carrots. 
Deeply rooting plants include artichokes, asparagus, parsnips, rhubarb and tomatoes. 
Most annuals need one inch of water per week and up to two inches in hot weather. Learn how to calculate an inch of water.
• Tomatoes need less water after fruit has set.
• Perennial herbs need less water after they're established. 

Plant spacing
Place crops according to size at maturity or according to spacing suggestions. Vegetables harvested before full maturity, such as beets or greens, may be placed more closely. 

Plant placement
Consider:
Shade: Place taller plants on the north side of your bed/garden so they will not shade shorter plants. Plant crops that enjoy light shade, such as lettuce, in the shadow of taller plants. 
Ease of access: Group shorter plants near the front of beds so they're easy to reach. 
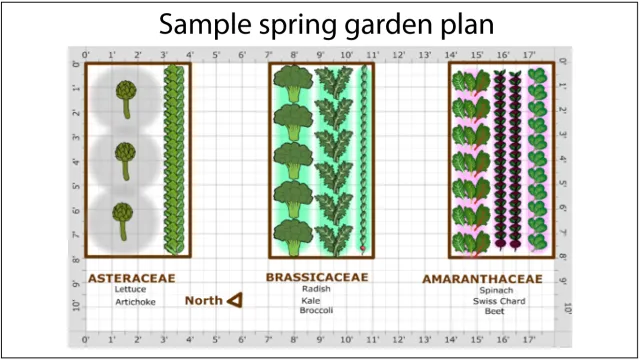
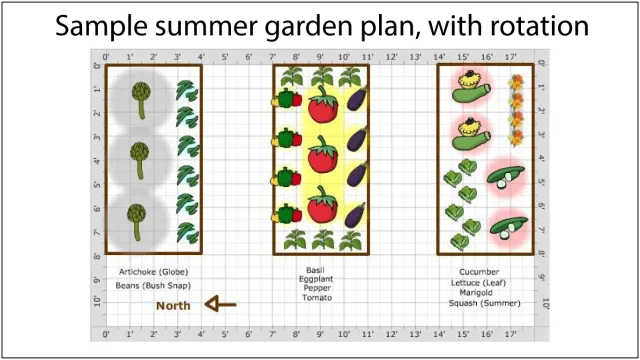
Rotation
Group plant families together for easier seasonal crop rotation.

Sample-Summer-plan

Frost-sensitive plants
Place frost-sensitive plants such as peas and citrus in protected areas near a structure, fence, or in an otherwise protected spot. Use cold frames to get seedlings started outdoors. 

Perennials
If space allows, grow perennials such as asparagus, artichokes, berries, herbs, fruit trees, sunchokes, and walking collards in separate beds or containers.
 

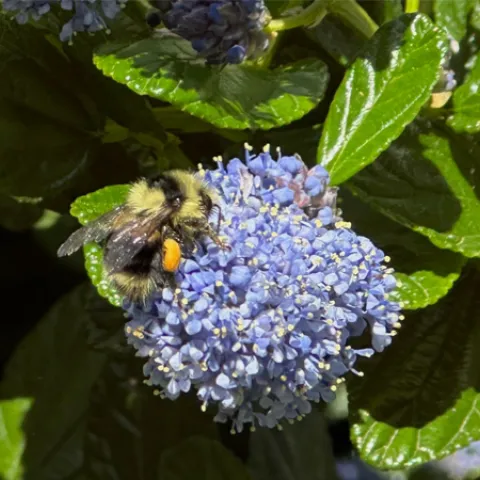
POLLINATORS: how to attract them 
Grow some easy-care, colorful plants near your edible garden to invite pollinators. Creative Commons

If not for pollination, our food gardens would be lovely, under-productive patches of green. In fact, pollination accounts for one out of every three bites of food we eat. That said, the need for pollination varies by crop:
 

Require no pollinationCarrots, kale, and other edibles, which we eat before pollination occurs
Self-pollinatingBeans, peas and tomatoes
Wind-pollinatedBeets, chard, and corn
Require pollinationBrassicas, cucumbers, melons, okra, pumpkins, squash and many fruit trees
Pollinated by hummingbirds, bees and other insects, and in their absence, humans!

Use our lists of Plants for Bees, Hummingbirds, and Butterflies. These plants are easy to grow, bloom heavily, and are good company for edible crops. They create spots of color, texture, and scent. The result is so much more than an edible garden. It is a resilient, sustainable, fascinating ecosystem. Learn more about habitat gardening, pollination, and pollinators 

KNOW YOUR SOIL TEMPERATURE: Guidelines for warm & cool season crops

Edible crops are not only sensitive to air temperatures; they are also sensitive to soil temperatures. Whether planting seeds or starts make sure soil temperature is adequate:

Warm season crops need soil temperature at 60 to 65 degrees. 

Cool season crops need soil temperature at about 40 degrees. 

How to take your soil's temperature
• Use an instant read thermometer, the kind used in the kitchen. Insert it into the soil about 3 inches deep. 
• The best time to check soil temperature prior to planting seeds and seedlings is in the morning because this will be the coolest soil temperature of the day. If you want to know the warmest soil temperature, check the soil in late afternoon.

To raise soil temperature
• Cover the bed for a few days with a dark material, such as heavy weed cloth. 
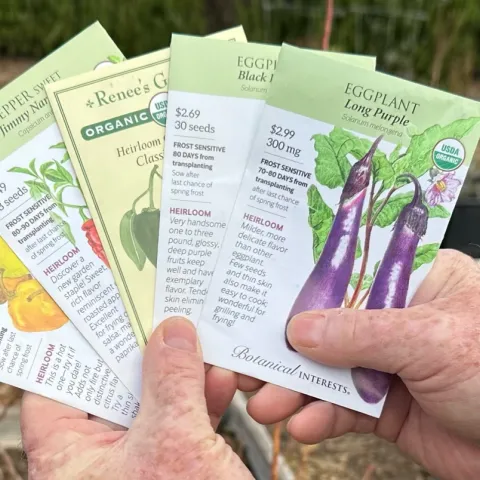
PLANTING: SEEDS OR STARTS?

When planting your garden, you have a choice between planting seeds or starts. Most gardens include plants propagated from both seeds and starts. 

WHAT ARE STARTS?
Starts are purchased ready to go into the ground.

Starts are plants you buy at the nursery or grow yourself from seed.

HOW TO PLANT STARTS

Harden off: If you have grown your own starts, be sure to harden them off for about a week before planting in the garden by leaving the plants outside each day for longer and longer periods of time but bringing them in at night. Starts purchased from a nursery are already hardened off. 
• Gather everything you need - Starts, a trowel, a yardstick or tape measure, tulle fabric, 9 gauge wire for fabric support, your planting plan, and transplant amendment that will be added to the bottom of each planting hole to help transplants develop strong roots.
Plant on a cool day or in the early evening when the plants will have time to adjust before exposed to afternoon heat. If the days following planting are expected to be hot, add a shade cover to protect the tender plants.
Begin with garden soil that is moist, but not wet, to the depth of the bed, ideally to 12 inches. 
Mark placement of plants based on your garden plan, spacing them according to size at maturity. 
Dig holes with a trowel as deep as the root ball and a little wider, sprinkle with transplant amendment. 
Remove starts from seedling pot or pack: Turn seedling pot over, give it a tap and gently remove starts from the growing pack. 
Lightly loosen roots and place in hole at the proper depth, replace soil, and pat firmly.
Water thoroughly. 
Add support for vining plants such as tomatoes, cucumbers, peas and beans just after planting. 
Adjust and secure irrigation lines if using drip irrigation. If using mulch, add on top of irrigation lines and keep it a couple inches away from the plant stem. 
Add plant label stakes with name and date of planting. For convenience, add the estimated maturity date. 
Cover transplants with tulle fabric until established. This prevents loss from birds and insects.
Keep moist. 


SEEDS: Growing your own starts
Start seeds in a fine textured seeding mix. Chu Tai, unsplash

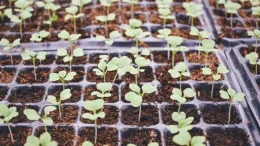
Follow directions on seed packets and decide if you are going to start the seed indoors in a container or direct sow into the garden. 

Benefits of growing edibles from seed:
Variety: Starting with seed reveals a world of vegetables that you will never find in the market or nursery. 
Cost: Growing from seed is less expensive than buying starts.
Sharing: You can exchange different varieties with friends. 
Disease resistance: Growing from seed reduces the risk of introducing diseases into your garden. 
More control over timing: This can help when rotating crops or doing succession planting. 


HOW TO SOW SEEDS INDOORS or in a cold frame outdoors

• Begin 3-6 weeks before planting into the garden. 
• Use a fine textured seeding mix 
• Use any kind of container that is at least 2 inches deep and drains. 
• Fill the container or flat with seeding mix. 
• Level out. 
• Place seeds more densely than recommended on the seed packet, as some will not germinate. 
• Once the seedlings are about 1-inch high, thin with scissors, giving each seedling 2 inches of space all around. 
• When the seedling has at least 2-3 true leaves, feed with fish emulsion diluted to half the standard strength. (Seeding mix does not usually contain nutrients since the seed uses nutrients stored in the seed.) 
• Transplant in the spring after danger of frost or according to the recommended planting time. 

Seed types to sow indoors or in a cold frame:
Smaller seeds are usually started in a flat in a protected environment (indoors or out) and transplanted after a full-set of leaves has formed and the plants have been hardened off (gradually exposed to outdoor elements). An exception are small seeds that mature quickly, such as lettuce and arugula, which may be directly sown into the garden.

Large seeds such as beans, peas or squash may be started indoors and transplanted to provide a head start on the growing season.

Medium size seeds such as those for eggplants, tomatoes and peppers are started indoors and transplanted outdoors. 
 

HOW TO SOW SEEDS DIRECTLY into the garden

• Plant large seeds the depth recommended on the seed packet (usually about the length of the seed).
• Scatter small seeds on the surface of the bed, then top lightly with soil. 
• Thin with scissors to recommended planting spacing when seedlings are 1 to 2 inches tall.
• Cover with tulle to protect from birds. 

Edible crops to sow directly by seed into the garden:
• Large seeds: beans, pumpkins, squash, peas  
• Root crops: beets, carrots, parsnips, radishes, turnips
• Quickly maturing seeds: braising mix, lettuce, microgreens


TIMING: when should you start growing?

In the edible garden, this is a critical question that could mean the difference between success and failure. Check online for information on specific plants, or use our planting calendar and our grow sheets as a guide.
 

BACK TO EDIBLES
> What Edible Gardens Need
> Best Choices for Marin
> How to Prepare
> How to Plant
> Edibles in Containers
> Planting Calendar
> Grow & Care Sheets for Vegetables, Herbs & Fruits
> Tips & Techniques
> How to Maintain
> Fruit Trees
> Top 20 Edible Garden Problems
> Cover Crops & Soil Enhancements in the Off-season
> Conserving Water

•••••••••

Visit our EDIBLE DEMO GARDEN at IVC Organic Farm & Garden
Primary Image
A harvest of crisp, bright green lettuce is satisfying anytime of the year
UC Marin Master Gardeners: Article

Growing Lettuce Year-Round

December 3, 2025
Lettuce is generally considered to be a cool-season annual, but with a little advanced planning and some judicious plant selection, Marin gardeners can enjoy home-grown lettuce throughout the year. Our temperate climate makes it possible to modify the growing conditions for lettuce and enable the plants to…
View Article
Primary Image
Bank vole
UC Marin Master Gardeners: Article

July 2025: Vole Invasion

July 16, 2025
July 2025: Vole Invasion Protecting the growing plants from hungry critters is an ongoing challenge in the Edible Demo Garden. Wire mesh is used extensively under planting beds and around the straw bales to discourage gophers. Yards of protective netting keep the birds and rabbits from eating young…
View Article
Primary Image
Patio gardening
UC Marin Master Gardeners: Article

June 2025: Patio Gardening

May 26, 2025
By Melissa McLean
 This past month EDG volunteers created a small “patio” in the garden to demonstrate how edibles can be successfully grown in limited space. Too often gardeners are discouraged from growing edibles, believing that it takes a large back yard with room for long rows of plants. However, with the…
View Article
Primary Image
Plastic tubbing of drip irrigation system
UC Marin Master Gardeners: Article

May 2025: Drip Irrigation Troubleshooting

April 29, 2025
By Melissa McLean
 When the winter rains end, it’s time for gardeners to focus on providing spring and summer edibles with the water they need to grow and produce. While hand watering may be the simplest way to adjust watering to the needs of individual plants, it’s not the most efficient means for getting the right…
View Article
Primary Image
Seed packets
UC Marin Master Gardeners: Article

April 2025: The Joys of Selecting and Planting Seeds

March 24, 2025
By Melissa McLean
 It’s hard to find a gardener who doesn’t love checking out new seed varieties and anticipating the abundant and tasty harvest they promise. The photos and descriptions are tantalizing and the names intriguing. Who wouldn’t be curious about a pumpkin variety called ‘Abominable’, a pepper named ‘Frodo’,…
View Article
Primary Image
There are many choices in by-pass pruners with models that fit different hand sizes.
UC Marin Master Gardeners: Article

February 2025: Choosing the Right Garden Tools

January 25, 2025
In January, the 2025 Marin Master Gardener training class was welcomed into the Edible Demonstration Garden for a discussion and demonstration on the use and care of garden tools. The right tools make the difference between gardening that is pleasurable and gardening that is a struggle.
View Article

January 2025: Natives in the Edible Garden

Primary Image
Ceanothus blossoms attract native California bumble bees.
Body

natives 1
Natives are welcome in the Edible Demo Garden. As a joint project with the Native Plant Guild in October 2021, garden volunteers planted a variety of sun-loving, drought tolerant California natives in a corner of the garden area. Some have flourished and some have not, but that’s what happens in a demonstration garden. It’s all about learning what plants need and the conditions that suit them best. The primary goals of the project were to provide year-round beauty and attract pollinators. It turns out that there are even more reasons why native plants benefit an edible garden.

Native Plants Attract Pollinators and Invite Beneficial Insects

natives 3
The blooming periods of native plants coincide with the times when pollinators are most active, and these can overlap with the flowering times of vegetable plants. Native plants that flower in early spring can bring in pollinators before vegetable blossoms emerge. This is particularly important for native bees who are even more efficient pollinators than honeybees. Fall blooming native plants help to create a steady supply of food and resources to keep the pollinators around and encourage them to overwinter in the garden.

Native plants also invite beneficial insects that are natural enemies of vegetable garden pests. Beneficials such as hoverflies, lady beetles, and lacewings go where they find the herbivorous insects they like to eat. It doesn’t matter to them whether their prey is on an edible plant or a native. The natives keep the beneficial insects nearby, so they are there to control pests when the vegetable crops are planted.

natives 2

Native Plants Improve Soil Health

Native plants support soil biodiversity by providing habitat for beneficial microorganisms like fungi and bacteria. Some can act as nitrogen-fixers to improve soil fertility. Natives with deep root systems can improve soil structure by creating channels through which water and nutrients can penetrate. When the roots and leaves of the native plants die back, they add organic matter to the soil reducing the need for soil amendments.

Native Plants are Low Maintenance

Natives don’t need fertilizing and require little watering once they are established. While some need deadheading and cutting back, it’s best to minimize the kind of tidying up that’s done in the edible garden. The native plants can offer a refuge for beneficial populations, providing them with undisturbed nesting and overwintering sites. Ideally the native plants attract enough beneficial insects and other natural enemies to maintain a healthy balance so that pests are kept in check.

natives 4
Occasionally a native plant can require more severe pruning. Recently a Coyote Brush, Baccharis pilularis, adjacent to the Edible Demo Garden, grew too large and began to produce an abundance of the fluffy white seeds typical of the female flowering plant. Although some classify Coyote Brush as a weed, it is a keystone plant which has significant value in a habitat garden. Armed with saws and pruning tools, the volunteers cut the overly ambitious native down to a manageable size.

Native Plants Add Beauty and Interest

Native plants bring unique beauty to the garden. The natives planted in the Edible Demo Garden were initially chosen to provide blooms throughout the year. Some flower early and bring color into the winter garden and others extend their blooming period into late fall. They add contrast to the flowering of the vegetables and fruit trees. Ceanothus ‘Concha’ now masks the compost bins with its copious cobalt blue flowers in early spring.  Coast Aster, Aster chilensis, provides bright, daisy-like blossoms throughout summer and fall. Bees and hummingbirds enjoy the showy red tubular blooms of California fuchsia, Epilobium, into late fall. The goal to bring native plants into the Edible Demo Garden to provide year-round beauty has been achieved.

For more information on growing native plants, click here.

UC Marin Master Gardeners

December 2024: Giving the Garden a Rest

Primary Image
Fava beans are an attractive and popular cover crop due to their nitrogen-fixing effects in the soil. Photo: Flickr
Body

Covercrop 1
After an especially busy summer and fall harvest season, it was time to consider what to plant next in the Edible Demo Garden. In Marin it’s possible to grow vegetables year-round and there are plenty of winter crops such as cabbage, cauliflower, and onions to select. However, another option is to not plant anything during the winter months and give the garden beds some time to rest and rejuvenate. This puts the focus on caring for the soil so that when it comes time for spring planting, the garden will be ready. With this plan in mind, the recent off-season activities for the Edible Demo Garden volunteers have concentrated on methods for giving the garden time to rest. The primary options for resting the garden are planting cover crops and allowing some beds to be fallow for a season.

Planting cover crops

There are many advantages to planting cover crops. Cover crops, sometimes referred to as “green manure”, are an excellent way to protect and improve soil. They increase organic matter, suppress weeds, prevent damage from wind and water erosion, and support beneficial insects and earthworms. Plus, they can look attractive while nurturing the garden.

Covercrop 2
Cover crops are divided into two main categories: legumes, such as clover and fava beans, and non-legumes, like rye and buckwheat. Legumes have the added benefit of fixing nitrogen by taking it from the air and converting it into a form to be used by plants. Cover crops are turned over when they start to flower and allowed to decompose prior to spring planting.

Two different cover crops were chosen for the Edible Demo Garden. Fava beans were planted in several of the garden beds and in the straw bales used for the summer crops. The latter is an experiment to determine if there is sufficient residual fertility in the straw bales to support another crop. In order to aid in germination and enhance their nitrogen fixing effects, the fava bean seeds were soaked in an inoculant containing rhizobacteria prior to planting. As an alternative cover crop, a green manure mix of bell beans, field peas, and purple/hairy vetch was planted in some of the raised beds. Past experience with crows eating the sprouting seeds necessitated the use of compost, straw, and protective netting to give the cover crop seedlings a fighting chance. The effectiveness of the different cover crops will be tested in spring when it is time to plant again.

Allowing beds to remain fallow

Covercrop 3
Taking a garden plot out of the crop rotation for a season can give the soil time to naturally replenish nutrients. It can also be a way to discourage pests, prompting them to move on once their food source is gone. However, fallow garden beds can also invite weeds and leave the soil exposed to the elements. In the Edible Demo Garden, layers of compost and straw were added to suppress weeds and protect the soil in the beds designated to be fallow. The winter rains will keep the soil moist and provide a habitat for earthworms and beneficial microbes.

Click here for more information on cover crops and soil enhancement in the off-season.

UC Marin Master Gardeners
Primary Image
Italian parsley is a popular biennial herb that grows well in sunny, moist garden conditions.
UC Marin Master Gardeners: Article

October 2024: Herbs Among the Edibles

September 25, 2024
Herbs may not be the stars in the Edible Demonstration Garden, but they are notable members of the supporting cast. Its hard to imagine a flourishing vegetable garden without a few culinary herbs as companions.
View Article