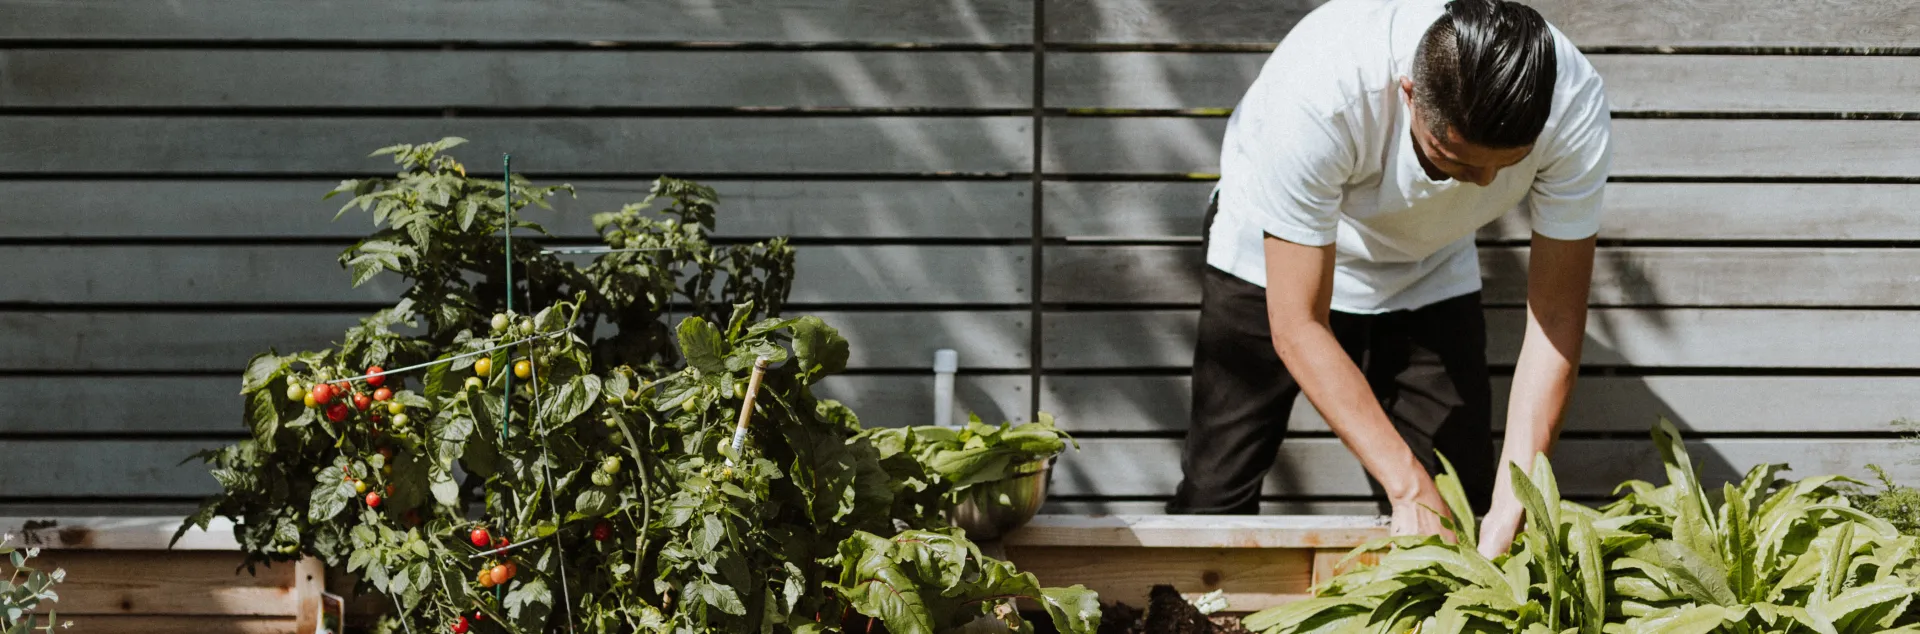
Growing Edibles in Containers

Containers can provide a quick and easy way to grow edibles
• A great solution when growing space is limited
• Locate to be convenient and accessible
• Relocate to protect edibles from bad weather
• Create visual interest in outside living areas
• Avoids soil borne diseases in native garden soil
• Reduces accessibility of some pests
**Note: Container plants require more frequent watering and fertilizing
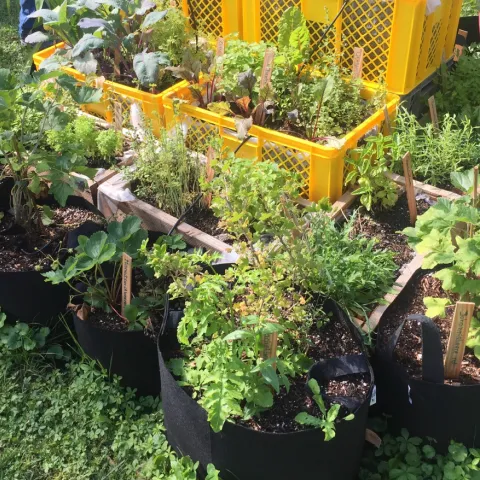
Any vegetable & herb that you can grow in the ground or in a raised bed can be successfully grown in a container.
Choose your containers:
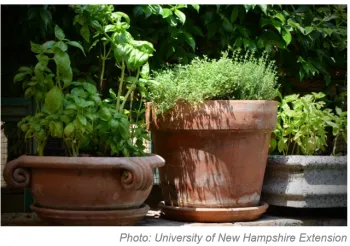
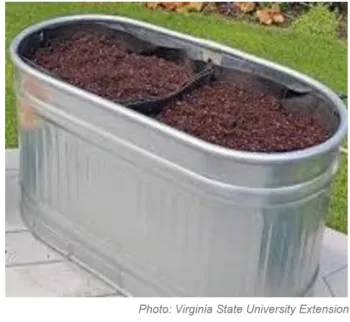
• Most containers will work if you have good drainage
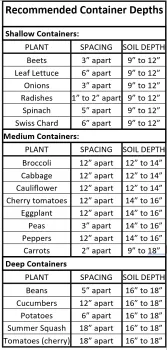
• Containers should be a minimum of 6 inches deep
• Some plants require more depth
Important considerations:
• Drainage holes are essential to allow excess water to drain so roots do not rot from sitting in stagnant water.
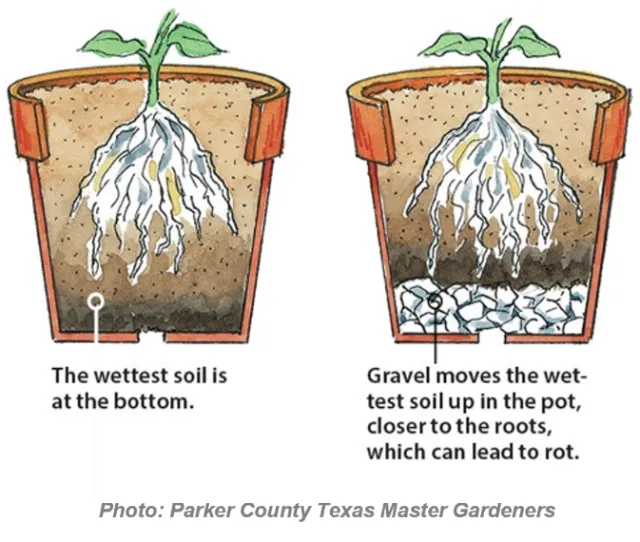
• Don’t add gravel, pebbles, or sand to the bottom of containers. This will make it more difficult for excess water to drain away from roots.
• Smaller containers and unglazed clay pots dry out very quickly in summer. They require more watering and have less room for roots to grow.
• Deeper containers provide more space for roots to grow down into in search of moisture and cooler temperatures.
This enables plants to thrive during the long, warm summer days which cause soil to dry out fast.
• Choose containers large enough to support plant root systems when they are full grown.
• If you are using recycled containers, scrub them well and rinse in a solution of nine parts water to one part bleach.
• Never choose a container that held toxic products.
Site your containers:
• Most vegetables need a minimum 6 hours of direct sun per day.
• Some leafy greens like lettuce, spinach, chard, and kale will tolerate part shade (3-4 hours minimum of sun per day).
• You can extend your growing season of some vegetables like leafy greens by moving their containers to a less sunny position during warm weather.
• Some herbs in small containers can be grown indoors.
Add Potting Mix:
Potting mix is one of the most important factors to growing happy and productive container plants. It supplies the roots with nutrients, air, and water. It allows space for root growth and it physically supports the plant.
• Garden soil should usually be avoided in containers as it can harbor disease, weed seed, and create drainage problems.
• Add high-quality fresh potting mix that is light, porous, and quick draining.
• The soil-less mix should retain moisture but also have plenty of air spaces for the roots.
• Water soil mix well and let it sit for a day to dampen and settle.
Plant seeds or seedlings:
• To get the most out of limited space, choose high yielding and dwarf varieties with small- to-moderate sized fruit.
• For plants that vine or trail, add stakes or trellis when you first plant so you will not damage roots by adding them later.
• Eggplant, peppers, and tomatoes are best planted as seedlings due to the seed germination needs.
• Plant beans, beets, carrots, cucumbers, lettuce, peas, radishes and summer squash from seed or seedlings.
• Remember to dampen your soil before you plant and gently water after.
Water
All containers dry out quickly. Watering requirements will vary according to the season, type of container, soil mix and sun exposure.
• Keep the soil moist. Do not allow the soil to dry out, especially while plants are young.
• Check containers daily. Stick your finger or moisture meter into the top inch of soil. If it is dry, water until some runs out the bottom of the container.
• Water early in the morning to avoid wet leaves at night when temperatures drop and mildew and disease organisms flourish. Use a slow even spray.
• In mid-summer and on windy days water requirements will be higher.
• To reduce evaporation and plant stress along with and saving water, mulch plants with straw or other non-woody material from June through the summer.
• Irregular watering contributes to stressed plants that may fail to thrive.
Fertilize
Use an organic fertilizer balanced for growing vegetables to be certain your plants get adequate nutrients.
• Confined root systems demand frequent but light fertilizing during their growing period.
• Nutrients are leached from the soil with every watering and need to be replenished regularly.
• Follow the package directions. Liquid and granular products can both be found on nursery shelves.
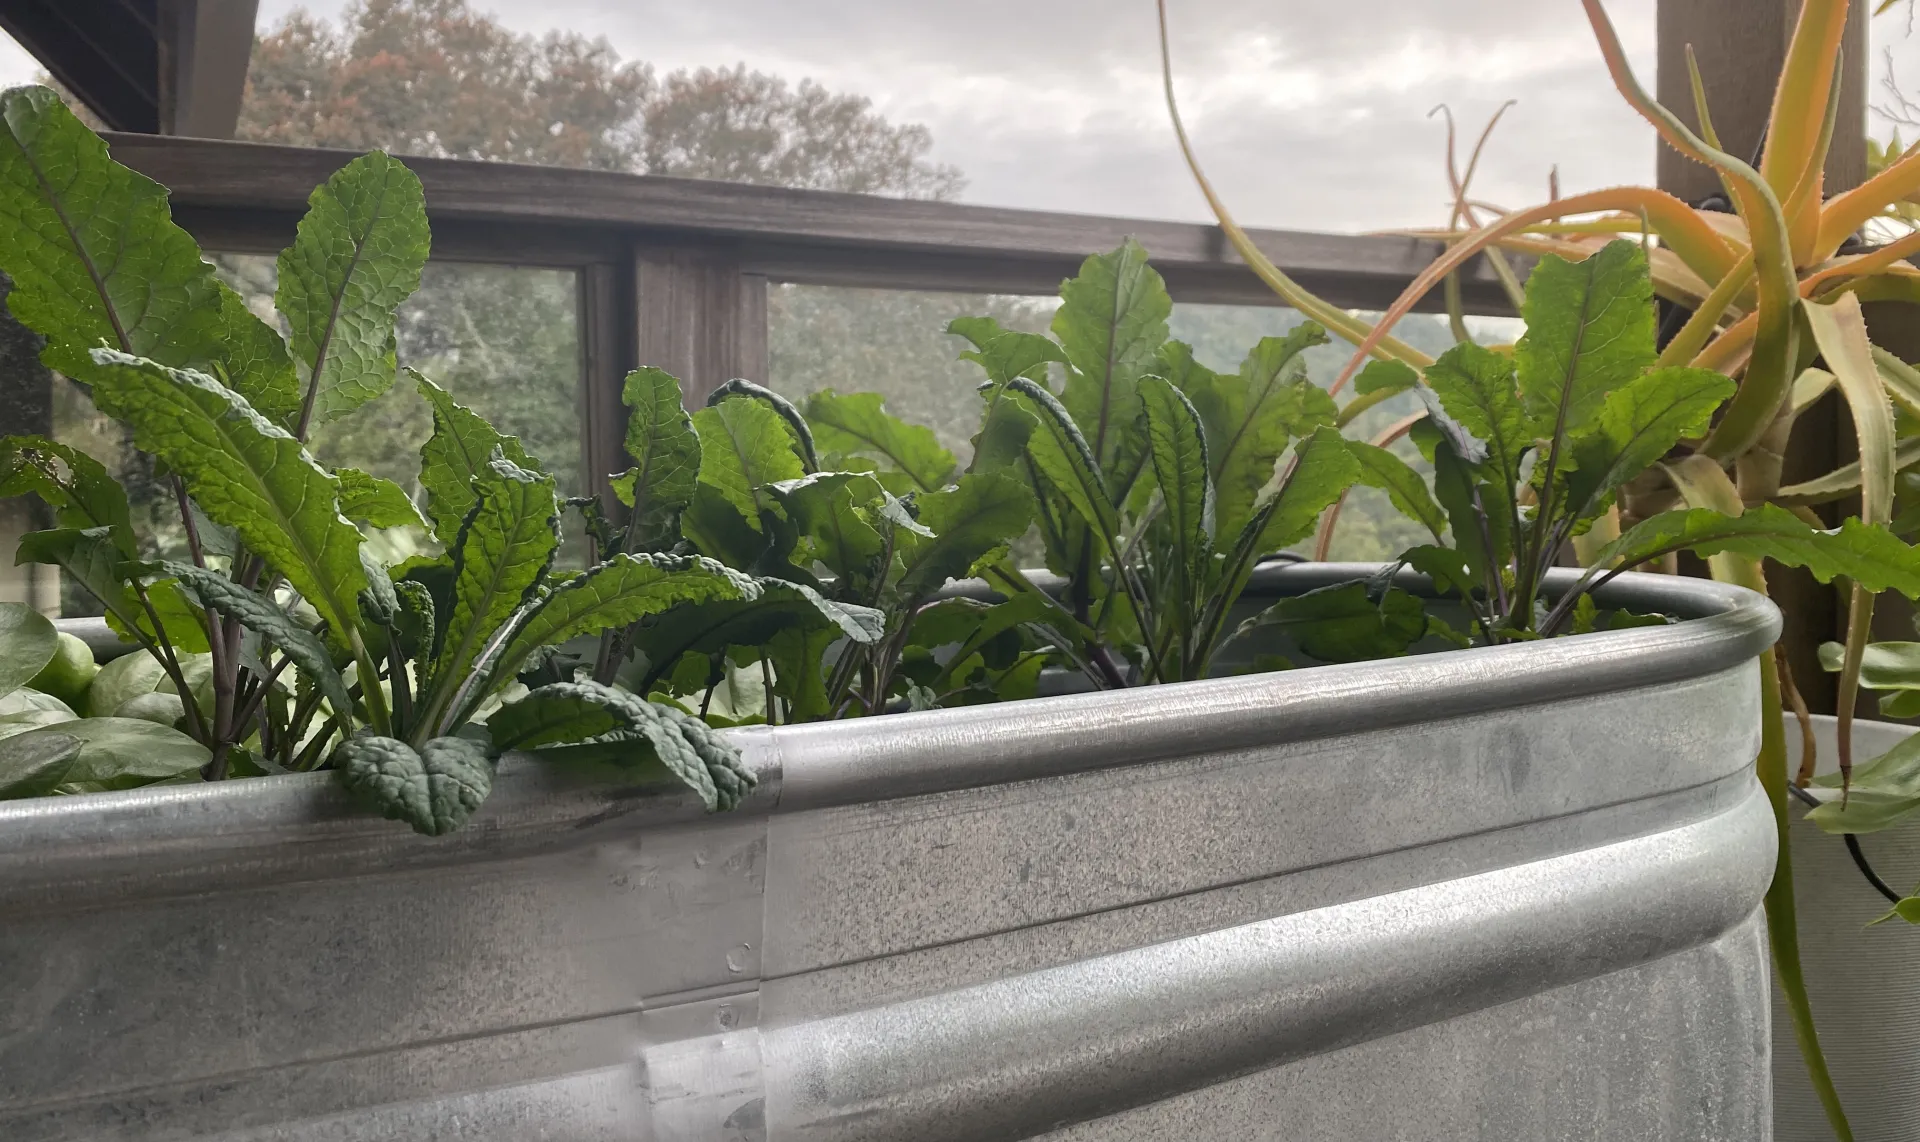
Be creative - most containers will work!
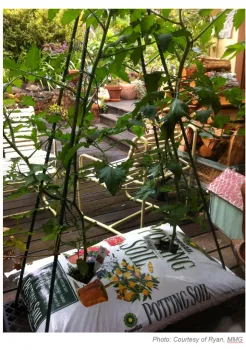
• These tomatoes are growing directly in a bag of potting soil.
• Holes were made in the bag for excess water to drain.
• A trellis provides support for the plants.
BACK TO EDIBLES
> What Edible Gardens Need
> Best Choices for Marin
> How to Prepare
> How to Plant
> Edibles in Containers
> Planting Calendar
> Grow & Care Sheets for Vegetables, Herbs & Fruits
> Tips & Techniques
> How to Maintain
> Fruit Trees
> Top 20 Edible Garden Problems
> Cover Crops & Soil Enhancements in the Off-season
> Conserving Water
•••••••••
Visit our EDIBLE DEMO GARDEN at IVC Organic Farm & Garden
September 2024: Tackling the Weeds


What is a Weed?
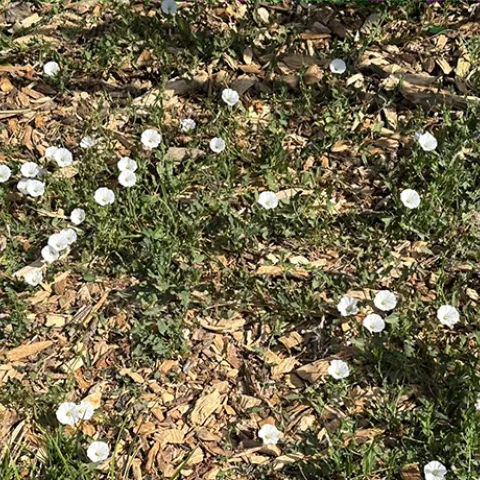
The definition of a weed is tricky – more a value judgement rather than a plant category. Weed is a label given to a plant that is undesirable where it is growing. Any type of plant can be considered a weed if it turns up as an unwanted volunteer and competes with crops and landscape plants for water and nutrients or harbors viruses that can infect other plants.

Although weeds are often described as invasive, the UC Integrated Pest Management Program considers invasive plants to be “a distinct group of weeds that occur in natural habitats”. They differ from common garden and agricultural weeds in that they are non-native and infest ecosystems causing damage to natural areas.
Annual vs Perennial Weeds
Annual weeds appear seasonally in summer or winter and are spread only by seeds. This makes a difference in how they can be controlled. The strategy is to get them out before they can go to seed. Common annual weeds include cheeseweed, crabgrass, purslane, and spurge.
Perennial weeds all have underground parts that enable them to spread through root systems as well as through seeds. These are the more stubborn weeds such as bermudagrass, field bindweed, dandelion, and yellow nutsedge. It takes some digging to completely remove perennial weeds.
Weed Management in the Edible Demo Garden

Read more about controlling weeds by clicking here.
Additional information can be found on the UC IPM website by clicking here.
July 2024: Fruit Tree Maintenance


Why prune fruit trees?
All fruit trees require pruning for optimum vigor and fruit production. Pruning is also a way to control tree size, making care and harvesting easier. The first pruning of the fruit trees in the Edible Demo Garden was done at the time of planting. Following recommendations for keeping the trees small, a hard heading cut was made on the new bare root trees to remove approximately two-thirds of the main trunk to about knee height. In the following years, both winter and summer pruning have helped to shape the trees and maintain their health. Pruning in the winter when a tree is dormant helps to invigorate it and encourage new growth. Summer pruning is done to remove excess growth and control the dimensions and shape of the tree. Ideally, pruning should strive for a balance between the growth of new wood and the removal of old wood. The goal is also to allow sunlight to reach the lower limbs to enhance fruit production.
Pruning to remove any damaged, diseased, dying, or dead limbs is always important. Rootstock suckers and sprouts emerging below the graft section of the tree need to be pruned off. Shoots growing from the rootstock deplete energy from the scion or grafted part of the tree where the fruit is formed. Likewise, water sprouts are suckers that grow upright in the crown of the tree, and they also should be removed to direct the tree’s energy to fruit-producing branches.
![]() | ![]() | ![]() |
Why should fruit be thinned?

What common diseases have affected the trees in the Edible Demo Garden?
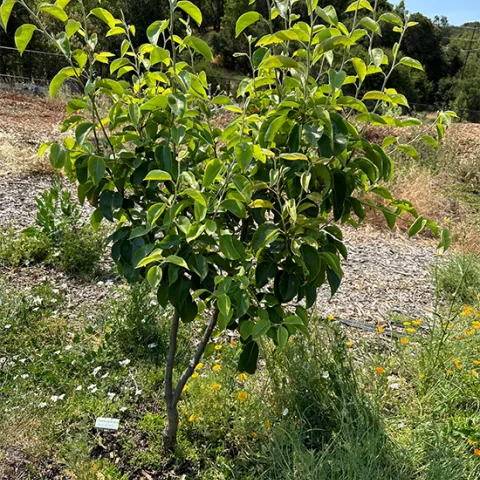
Sadly, organic gardens are not immune to the bacterial and fungal diseases that frequently affect fruit trees. Fire blight is a bacterial infection that attacks pome fruits like pear, apple, and quince trees. Young blossoms, shoots, and fruit shrivel and blacken, causing branches to appear burned. The disease can spread rapidly so it’s important to cut diseased branches back into about 12 inches of healthy wood to remove all the infected tissue. The bacteria can be transmitted by pruning tools, so they need to be sterilized before making each cut. In the Edible Demo Garden, a young Bartlett pear tree was infected by fire blight this year.
A frequent problem for stone fruits such as apricots, peaches, and plums, is leaf curl. This is caused by a fungal infection that attacks the leaves, shoots, and fruit, causing leaves to become thickened and pucker and fruit to drop. The fungus overwinters and becomes active in the spring when it is spread by splashing rainfall. The leaf curl fungus has infected an Asian plum tree in the Edible Demo Garden.
Copper-based fungicides can be used for the prevention of both fire blight and leaf curl; however, the timing of the applications is important. Treatment needs to be initiated early before any signs of disease are visible. Because copper is a naturally occurring mineral, it is acceptable for use in organic agriculture.
April 2024: The Importance of Soil Testing


However, soil can look and feel healthy, and still be lacking nutrients essential for optimum plant growth. Plants suffering from malnutrition look unhealthy and show symptoms of deficiency. Growth may be stunted, leaves may be chlorotic (yellowed) or distorted, and shoots appear short and thin. Too little or too much of any one nutrient can cause problems. The best way to check for a lack of nutrients in the soil is to test a sample.
How are the nutrient components of soil tested?

Any soil test should start with a carefully collected soil sample. Use a stainless-steel trowel or shovel to obtain a sample at least six to eight inches below the soil surface. Avoid wet soil, if possible, the sample needs to be dry for testing. Taking samples from several places in a garden bed and mixing them can be useful in measuring overall chemical properties. However, samples from different garden areas (vegetable, perennial, lawn, etc.) should be kept separate. Soil testing laboratories generally provide specific instructions on sample collection.
Why does soil pH matter?
Nutritional elements in the soil need to be in a soluble chemical form to be absorbed by plant roots. There must be sufficient moisture in the soil to allow the roots to take up and transport the nutrients. The temperature of the soil also needs to fall within a certain range for uptake to occur. Finally, the solubility of the nutritional elements and the activity of the microorganisms responsible for the chemical transformation of nutrients are directly influenced by soil pH. An essential nutrient can be present in the soil, but not in a form the plant can use. Each nutrient has an ideal pH range for plant availability. At pH levels that are too acidic or alkaline, some nutrients can become insoluble and not accessible to plant roots. Phosphorus, calcium, and magnesium are elements that become less accessible as soil increases in acidity, while the availability of iron, zinc, and manganese is reduced in more alkaline soils. The ideal pH for most plants is between 5.5 and 7.5.
What nutrients are commonly lacking in soil?

For more information on assessing soil health, click here.
For hands-on practice in soil testing come to the workshop co-sponsored by the Edible Demo Garden and the Edibles Guild. Click here to register.
March 2024: Making Soil for Seeds


However, the Edible Demo Garden volunteers are not a group to remain idle, especially when it’s time to start seedlings for the spring and summer garden. The organic seeds for the chosen crops had arrived and they needed to be planted in the proper soil mixture and placed in the greenhouse to germinate. So, on a rare dry day, an enthusiastic group of volunteers met to make soil for growing seedlings.
What soil is best for starting seeds?

Breakfast Mix

- 4 wheelbarrows Lunch Mix (20 cubic ft., already sifted)
- 1 bag Vermiculite (4 cubic ft.) (medium or fine)
- 1 bag Peat Moss (4 cubic ft.)
Lunch Mix
Lunch mix is used for potting up seedlings prior to transplanting or for bigger plants that will remain in 1–3-gallon containers for several months or more. The recipe for lunch mix is as follows. All the ingredients are mixed thoroughly and sifted together.
- 6 wheelbarrows sifted compost
- 1 bag Peat Moss (4 cubic ft.)
- 1 bag Vermiculite (4 cubic ft.) (medium or fine)
- 1 bag Perlite (4 cubic ft.) (medium or fine)
- 10 lbs or 6 qt Azomite (micronized)
- 5 lbs or 5 qt Feather Meal (fine)
- 2.5 lbs or 2 qt Kelp Meal (fine)
What is the purpose of the ingredients in a seedling mix?

- Compost – adds structure, provides nutrients, and contains beneficial microbes
- Peat moss – retains moisture (coconut coir is considered a sustainable alternative)
- Vermiculite – mined mineral, increases soil porosity and adds calcium and magnesium
- Perlite – light, volcanic rock, helps to aerate by increasing pore space
- Azomite – adds trace minerals
- Feather meal – releases nitrogen
- Kelp meal – adds nitrogen, potassium, and phosphorus
Ready to plant
Once the “breakfast mix’ was made, it was used to fill seeding trays and planting could begin. A light topping of vermiculite was added to each cell to maintain the right moisture level.
Click on the following for more information on soil mixes and starting plants from seed:
January 2024: Planting Time for Artichokes


What is an artichoke?
Artichokes are large plants in the sunflower family (Asteraceae). The edible parts are the large flower buds that form on the tops of tall stalks. The buds are typically green, but some varieties are violet-tinged. Buds that are not harvested for cooking and eating will open into attractive purple thistlelike flowers.
Although some may consider artichokes exotic and too much trouble to eat, they have been enjoyed since Roman times. Italian immigrants brought artichokes to Monterrey County where they grew well in the Mediterranean like climate. When artichokes first became popular in the US there was a problem meeting the demand and there are stories of a Mafia attempt to corner the market. Fortunately, we can now have all the artichokes we want to eat when they are in season.
What artichoke varieties grow well in Marin?

Are Artichokes Annuals or Perennials?
In California artichokes are commonly grown as short-lived perennials producing both spring and fall crops. After the spring harvest they are cut back to the ground and kept dry to encourage summer dormancy after which they are regrown in the fall for another crop. However, early maturing varieties like ‘Imperial Star’ and ‘Colorado Star’ also work well as annuals when planted in late fall. In the Edible Demo Garden, the two new varieties replaced older plants that had aged past their prime and suffered some gopher damage.
How to Grow and Harvest Artichokes

The buds on the artichoke plant are ready to harvest just as the lowest bracts begin to open. Once a bud opens more fully, the tenderness and flavor diminish. Harvesting the top bud stimulates the lower buds to develop. Buds should be harvested by cutting the stem about 2 inches below the bud.
For more information on growing artichokes, click here.
December 2023: Caring for the Soil

After the fall harvest was over, it was time to clean up and replenish the soil in the Edible Demo Garden. Healthy soil is fundamental to the success of the next season’s crops. Even in beds that are temporarily fallow, the soil needs to be nurtured and protected. In November, volunteers were busy with three major soil-boosting activities - spreading compost, adding mulch, and planting cover crops.
Why add compost?
The value of compost cannot be overestimated. Most edible crops are heavy feeders and leave the soil depleted of nitrogen and other essential nutrients after they are harvested. Adding a layer of compost to the soil is an earth-friendly way to help restore those nutrients and support good soil structure. Since compost is decomposing organic matter, it needs time to make the nutrients available to plants. In the Edible Demo Garden, compost is applied to all the garden beds prior to planting the next season’s crop.
What is the purpose of mulch?

In late fall, Edible Demo Garden volunteers take apart the straw bales used to grow warm season vegetables. The used straw becomes recycled mulch. Initially, the straw was considered suitable as compost material, however, subsequent testing found it to be low in nitrogen. Although much nitrogen was added to the bales during the growing season, most of it was either taken up by the plants or washed out by watering and rain.
Why plant cover crops?

For several years Edible Demo Garden volunteers have been cultivating a large garden area known as “the back 40”. Planting a cover crop of fava beans in the fall is one of the strategies for improving the poor soil in that area. Before the fava beans could be planted in November, some light tilling of the soil was necessary to improve the penetration and decomposition of the four wheelbarrows full of compost spread by the volunteers. Prior to planting, the bean seeds were soaked in an inoculant containing rhizobacteria to maximize their nitrogen fixation effects.


Paying careful attention to spacing and depth requirements, 150 inoculated fava bean seeds were planted in the back 40 by the volunteers. Some watering will be necessary until the rains begin, but a good crop of green manure should be available to nourish the soil in the spring.
For more information on building healthy soil, click here.