planting kale
UC Marin Master Gardeners

Edibles in Containers

Growing Edibles in Containers
 

Image
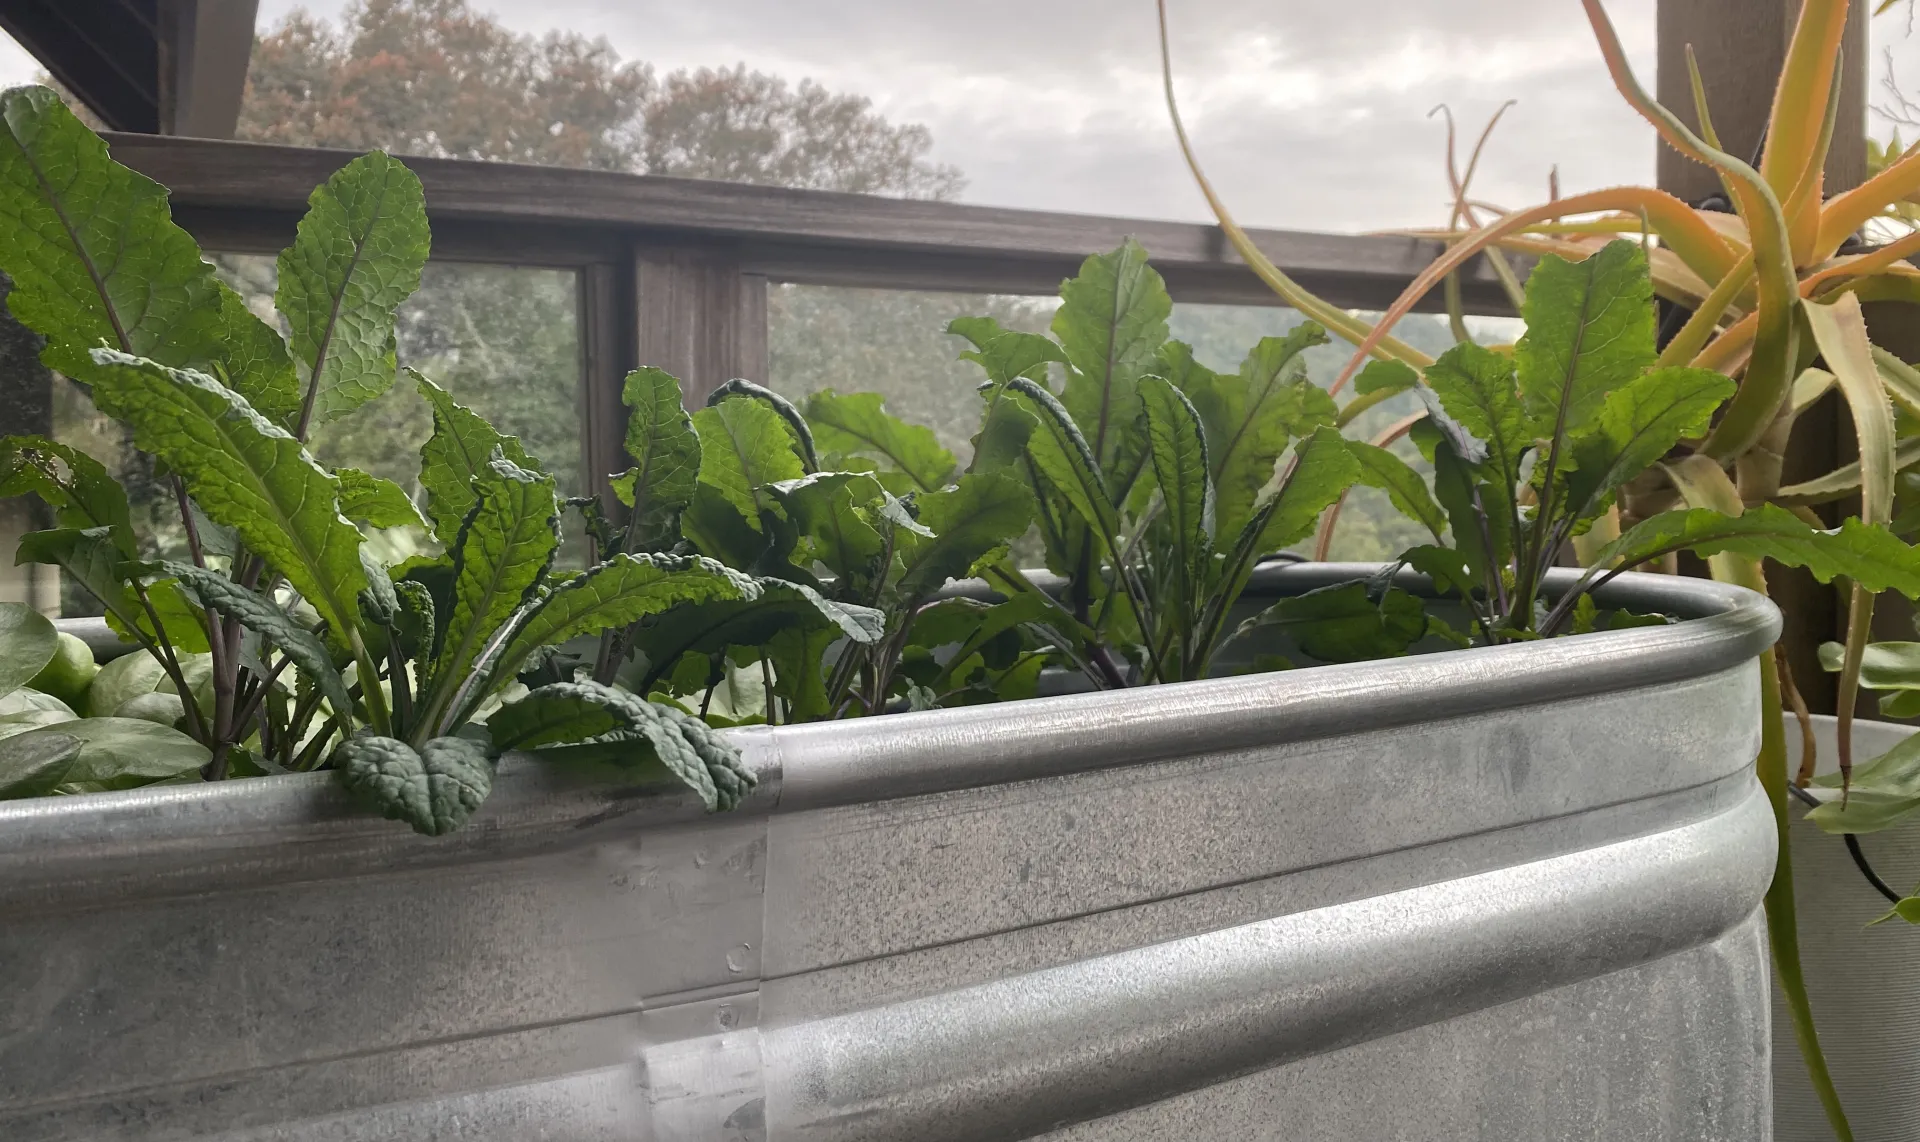
Kale in trough

Containers can provide a quick and easy way to grow edibles

• A great solution when growing space is limited
• Locate to be convenient and accessible
• Relocate to protect edibles from bad weather
• Create visual interest in outside living areas
• Avoids soil borne diseases in native garden soil
• Reduces accessibility of some pests

**Note: Container plants require more frequent watering and fertilizing


Any vegetable & herb that you can grow in the ground or in a raised bed can be successfully grown in a container.
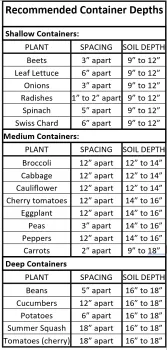
planting chart


Choose your containers:

• Most containers will work if you have good drainage
• Containers should be a minimum of 6 inches deep
• Some plants require more depth


Important considerations:

Drainage holes are essential to allow excess water to drain so roots do not rot from sitting in stagnant water.
Don’t add gravel, pebbles, or sand to the bottom of containers. This will make it more difficult for excess water to drain away from roots.
Smaller containers and unglazed clay pots dry out very quickly in summer. They require more watering and have less room for roots to grow.
Deeper containers provide more space for roots to grow down into in search of moisture and cooler temperatures. 
This enables plants to thrive during the long, warm summer days which cause soil to dry out fast.
Choose containers large enough to support plant root systems when they are full grown.
• If you are using recycled containers, scrub them well and rinse in a solution of nine parts water to one part bleach.
Never choose a container that held toxic products.


Site your containers:
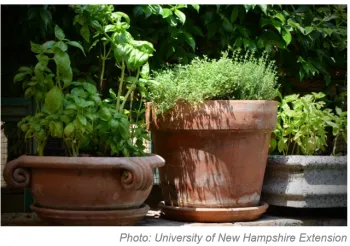
potted herbs

Most vegetables need a minimum 6 hours of direct sun per day.
Some leafy greens like lettuce, spinach, chard, and kale will tolerate part shade (3-4 hours minimum of sun per day).
• You can extend your growing season of some vegetables like leafy greens by moving their containers to a less sunny position during warm weather.
• Some herbs in small containers can be grown indoors.


Add Potting Mix:
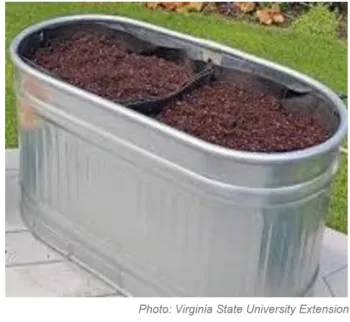
trough garden

Potting mix is one of the most important factors to growing happy and productive container plants. It supplies the roots with nutrients, air, and water. It allows space for root growth and it physically supports the plant.

• Garden soil should usually be avoided in containers as it can harbor disease, weed seed, and create drainage problems.
• Add high-quality fresh potting mix that is light, porous, and quick draining.
• The soil-less mix should retain moisture but also have plenty of air spaces for the roots.
• Water soil mix well and let it sit for a day to dampen and settle.

 
Plant seeds or seedlings:

• To get the most out of limited space, choose high yielding and dwarf varieties with small- to-moderate sized fruit.
• For plants that vine or trail, add stakes or trellis when you first plant so you will not damage roots by adding them later.
• Eggplant, peppers, and tomatoes are best planted as seedlings due to the seed germination needs.
• Plant beans, beets, carrots, cucumbers, lettuce, peas, radishes and summer squash from seed or seedlings.
• Remember to dampen your soil before you plant and gently water after.


Water
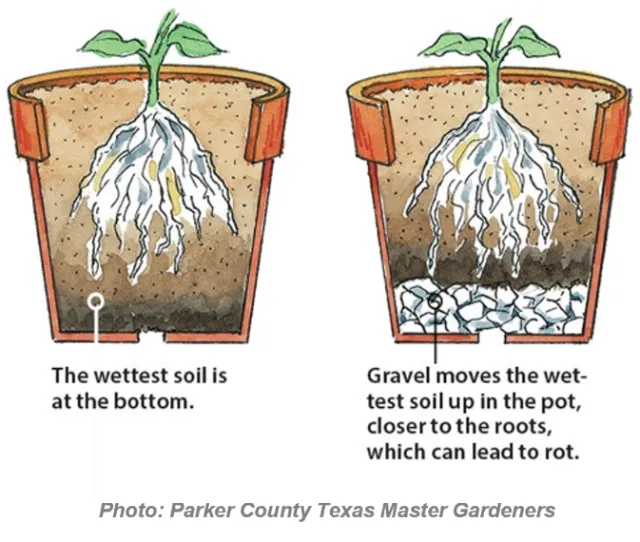
gravel in pots

All containers dry out quickly. Watering requirements will vary according to the season, type of container, soil mix and sun exposure.

Keep the soil moist. Do not allow the soil to dry out, especially while plants are young.
Check containers daily. Stick your finger or moisture meter into the top inch of soil. If it is dry, water until some runs out the bottom of the container.
Water early in the morning to avoid wet leaves at night when temperatures drop and mildew and disease organisms flourish. Use a slow even spray.
• In mid-summer and on windy days water requirements will be higher.
• To reduce evaporation and plant stress along with and saving water, mulch plants with straw or other non-woody material from June through the summer.
Irregular watering contributes to stressed plants that may fail to thrive.


Fertilize

Use an organic fertilizer balanced for growing vegetables to be certain your plants get adequate nutrients.
• Confined root systems demand frequent but light fertilizing during their growing period.
• Nutrients are leached from the soil with every watering and need to be replenished regularly.
Follow the package directions. Liquid and granular products can both be found on nursery shelves.

Be creative - most containers will work!
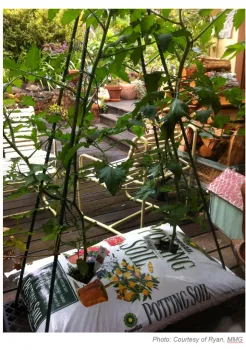
container garden

• These tomatoes are growing directly in a bag of potting soil.
• Holes were made in the bag for excess water to drain.
• A trellis provides support for the plants.


BACK TO EDIBLES
> What Edible Gardens Need
> Best Choices for Marin
> How to Prepare
> How to Plant
> Edibles in Containers
> Planting Calendar
> Grow & Care Sheets for Vegetables, Herbs & Fruits
> Tips & Techniques
> How to Maintain
> Fruit Trees
> Top 20 Edible Garden Problems
> Cover Crops & Soil Enhancements in the Off-season
> Conserving Water

•••••••••

Visit our EDIBLE DEMO GARDEN at IVC Organic Farm & Garden
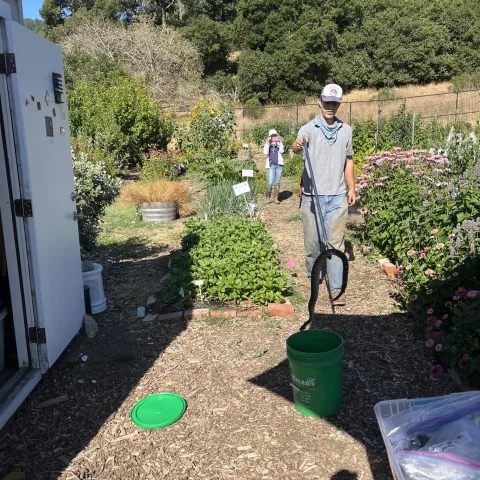
 

This is an Active Rattlesnake Year. Take Precautions.

Primary Image
snake being captured and placed in a bucket
Body

While the main focus of the EDG (Edible Demonstration Garden) is growing edibles and sharing that knowledge with the public, we cannot forget the health and safety of our gardeners.

Rattlesnakes have been particularly active this year with daily sightings all over the farm and in the EDG.  Protective gear is mandatory. It consists of long pants, closed toe shoes (boots preferable) and a heightened awareness of every step you take. In addition, protective shin guards are available from the Farm. The Farm has a protocol for removing the rattlesnakes and we work closely with them to protect everyone. 

Other proactive/ protective behaviors are stomping on the ground when we arrive. Snakes are sensitive to vibrations and we let them know “we are here”. We also will use a long stick or pole to lift up over-grown plants to check for their presence before trying to harvest. Respectful and safe behavior helps to remind us that “they were here first”.

We hope we have not scared off any prospective Edible Demonstration Gardeners. We are there Tuesdays and Fridays, but the Farm staff are there 5 days a week and are a tremendous resource for all things edible and growing and also living there.

Article by Lisa Webber
 

UC Marin Master Gardeners

Ergodynamic Hügelkultur at the Edible Demonstration Garden

Primary Image
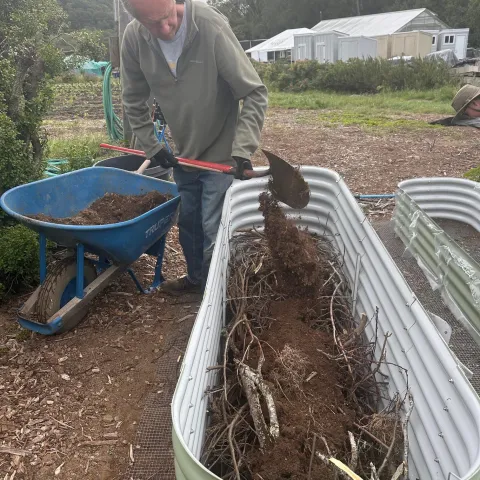
filling raised bed with sticks on the bottom and soil on top
Body

At the EDG Row 1 and 2 are closest to the hedge that is home to rabbits, squirrels, quail and numerous other creatures that love to devour our crops. Our tried and true methods for protecting our tender seedlings with hardware mesh on the bottom and protective netting on the top have been regularly defeated. 

So this spring we installed 4 new raised beds in row 1 & 2. All are 7 feet long by 2 feet wide. Two of them are 15 inches high and two of them are 29 inches high. We are looking forward to planting in these without having to get down on our hands and knees or bed over. 24-36 inches is recommended as the best height for raised beds.  And the 2 foot wide width eliminates back issues when reach across the bed. 

But a lot of soil is required for the tall beds, specifically 8 cubic feet.  We used a modifed form of  Hugelkulture  and filled the bottom half with sticks and branches that had recently been cut from the orchard on the farm.  For the two tall raised beds they each required 4 wheel barrels of native soil, 4 wheel barrels of  young compost and 4 wheel barrels of finished compost.  Thank you Eric D and Vanessa L for taking the lead. 

We may still have to use protective netting to keep the birds out, depending on the crop, but hopefully all the critters that live in the hedge next door won’t be able to easily get access.    

Article by Jean Christofferson

UC Marin Master Gardeners

Growing Lettuce Year-Round

Primary Image
A harvest of crisp, bright green lettuce is satisfying anytime of the year
Body

Lettuce is generally considered to be a cool-season annual, but with a little advanced planning and some judicious plant selection, Marin gardeners can enjoy home-grown lettuce throughout the year. Our temperate climate makes it possible to modify the growing conditions for lettuce and enable the plants to thrive in all seasons. That’s good news for salad lovers!

A harvest of crisp, bright green lettuce is satisfying anytime of the year

EXTERNAL IMAGE

Seasonal Challenges for Growing Lettuce

Lettuce grows best in 45-to-73-degree temperatures. Heat above 80 degrees causes most varieties to bolt (produce flowers) and become bitter. Temperatures below freezing often result in plant damage. Additionally, the shorter winter daylight hours slow or pause growth.

Volunteers in the Edible Demo Garden like a challenge, so learning how to grow a steady crop of lettuce in every season was an ideal project. Lettuce has become a popular crop at the Indian Valley Organic Farm & Garden. Although the success of the project was evident quantitatively in the over 260 heads of lettuce harvested since July 1, 2025, the qualitative gains, in terms of knowledge and experience, are immeasurable. Some key strategies identified for lettuce growing success include selecting the best varieties, succession planting, and managing environmental conditions.

Selecting the Best Varieties

Lettuce varieties are divided into four categories: crisphead, butterhead, looseleaf, and romaine. Crisphead is the iceberg lettuce found in grocery stores. It takes longer to develop and is difficult to grow in hot climates. It’s not a popular choice for home gardeners and is not a variety grown at the Edible Demo Garden.

Butterhead lettuce, also called bib lettuce, is more heat-tolerant. Varieties of butterhead that have thrived in the Edible Demo Garden are ‘Red Cross’ and ‘Aunt Mae’s Bibb’. Both are heat-tolerant and slow to bolt. ‘Red Cross’ has bright red and green leaves making it especially appealing in summer salads.

Loose-leaf lettuces include the “cut and come again” varieties with different leaf shapes, some described as oak leaf-shaped. They can be harvested by taking the outer leaves and leaving the central leaves to mature for future picking. ‘Smile’ is a bright green oakleaf variety that has performed particularly well in the Edible Demo Garden. Other loose-leaf varieties grown in the garden are ‘Morgana’ and ‘Bijella’. ‘Muir Summer Crisp’ is a dense, wavy-leafed variety that is exceptionally heat-tolerant and slow to bolt. 

Romaine lettuce, such as ‘Little Gem’ also grows well in the Edible Demo Garden but takes longer to mature and is not as heat-tolerant as other types. As a result, it is not as productive in the garden as the butterhead and loose-leaf varieties.

Succession Planting

Sow lettuce seeds indoors to germinate for succession planting

A year-round lettuce harvest requires always having lettuce growing in different stages. That means starting seeds indoors or direct sowing in beds at the same time mature lettuce is being harvested. A volunteer day in the Edible Demo Garden might involve sowing lettuce seeds in cells to germinate in the greenhouse, planting the starts that are now ready in the garden beds, and harvesting the fully grown heads of lettuce for distribution in community-supported agriculture boxes. Intervals for succession planting vary according to the crop, but sowing seed every two weeks is about right for lettuce.

Managing Environmental Conditions

Lettuce requires proper watering and protection to thrive. Frequent, light watering is important for shallow-rooted lettuce. Too little water will stunt and toughen the plants, and too much water causes root rot. Mulching around the plants helps maintain moisture and keeps the leaves off the ground.

Lettuce seedlings need water and protection in outdoor garden beds

Protection from heat and pests can be challenging. Lettuce appreciates some shade in the summer, so planting it next to taller plants or using shade cloth can reduce the chances of it bolting. Animals and insects love lettuce too. In the Edible Demo Garden, lettuce beds are covered in protective netting to deter hungry birds, rabbits, and other critters. Mesh wire is placed under the beds to stop invasions from below. Even that didn’t prevent gophers from tunneling through the wood on the side of one of the beds and feasting on a few heads of lettuce. The protective netting also provides some shelter from the sun and flying insects. Aphids, earwigs, and slugs can still be a problem, so it pays to be vigilant and remove them as soon as they are discovered.

Click here for more information on growing lettuce:

https://ucanr.edu/site/uc-marin-master-gardeners/documents/lettuce

Check out our new YouTube video:


UC Marin Master Gardeners
Primary Image
Bank vole
UC Marin Master Gardeners: Article

July 2025: Vole Invasion

July 16, 2025
 Protecting the growing plants from hungry critters is an ongoing challenge in the Edible Demo Garden. Wire mesh is used extensively under planting beds and around the straw bales to discourage gophers. Yards of protective netting keep the birds and rabbits from eating young seedlings and ripening fruit…
View Article

June 2025: Patio Gardening

Primary Image
Patio gardening
Body
Image
Patio gardening
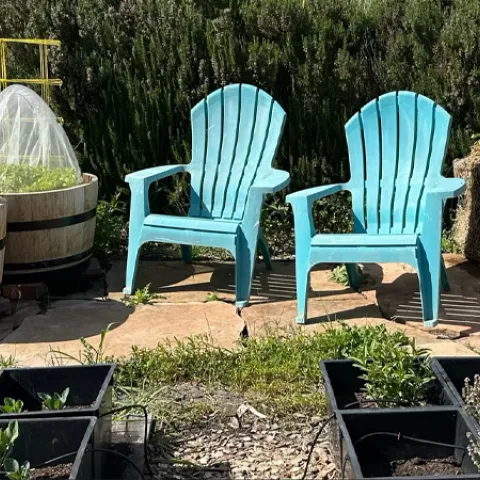
The new “patio” space in the Edible Demonstration Garden

This past month EDG volunteers created a small “patio” in the garden to demonstrate how edibles can be successfully grown in limited space. Too often gardeners are discouraged from growing edibles, believing that it takes a large back yard with room for long rows of plants. However, with the imaginative use of containers even a small deck, patio, or balcony can be converted into flourishing garden.

What are the basic requirements for growing edibles in small spaces?

Straw bale gardening
A straw bale is a container for growing squash in the “patio” garden

Sun – Edibles need 4 to 6 hours of sunlight. Regardless of the size of the growing area, sun exposure is essential. Leafy crops such as lettuce and chard require at least 4 hours of sun per day and fruiting crops like tomatoes, melons, and beans need at least 6 hours of sunlight daily. It’s important to choose the sunniest spot on a deck or patio for an edible garden area.

Water Container plants need water more often than those grown in the ground. The need to transport water to growing plants with buckets or watering cans can diminish the pleasure in growing edibles. While drip irrigation is ideal, a hose attached to a water source will suffice.

Containers – The possibilities for garden containers are numerous and range from commercial pots, planters, troughs, and bags to the creative repurposing of old pans and buckets, wooden crates, wheelbarrows, and, of course, wine barrels. A used filing cabinet with the drawers removed can make a great container for edibles. In the Demo Garden, a straw bale provides a patio container for yellow fin squash. Regardless of the type of container, good drainage is important so it may be necessary to drill holes to allow water to flow through easily.

Grow bag container
Grow bags make handy portable containers for edibles in small spaces


Containers need to be deep enough to provide sufficient space for root growth. Depth requirements vary with the type of crop. Salad greens and some herbs can grow in 6- to 10-inch-deep containers while peas, eggplant, and peppers need at least 14 to 16 inches to develop a strong root system. Tomatoes in containers require a minimum soil depth of 18 inches.

Soil – The potting mix used in containers should be porous and fast draining, yet moisture retentive. A high-quality mix that contains compost and other organic matter is best. Garden soil is too heavy, difficult to keep evenly moist, and can harbor disease. Organic fertilizers should be added in frequent but light amounts as the watering that container plants require leaches nutrients from the soil.

Additional tips for small space edible gardening

Vertical gardening
When space is limited, think vertically
Credit: PickPik

Take advantage of vertical space – Trellises and stakes help tall and vining plants to grow upward. Use walls or fences as additional planting space by adding shelves, racks, or hanging baskets. A recycled step ladder is an inexpensive vertical gardening option. 

Avoid damage to structures – Use blocks or bricks under containers to prevent rotting wooden decks or stairs. Consider the weight of the soil and container when planting on a balcony.

Protect against animals and pests – Plants in containers are susceptible to the same pests as in-ground plants. Cages or netting might be necessary to protect against birds, squirrels, and other critters.

Don’t forget the pollinators – Adding a few flowering plants to a container garden can help to attract pollinators to the edibles and increase veggie and fruit production.
 

Click here for more information on growing edibles in containers.

UC Marin Master Gardeners

May 2025: Drip Irrigation Troubleshooting

Primary Image
Plastic tubbing of drip irrigation system
Body
Drip irrigation at plant's soil level
Drip irrigation delivers water at soil level where it can more easily reach plant roots

When the winter rains end, it’s time for gardeners to focus on providing spring and summer edibles with the water they need to grow and produce. While hand watering may be the simplest way to adjust watering to the needs of individual plants, it’s not the most efficient means for getting the right amount of water to an entire garden.

Drip irrigation has proven to be the best option for home gardeners. It is particularly suitable for edible gardens because it delivers the water at the soil level and avoids water on the plant leaves which can lead to problems with mold and mildew. 

Plastic tubbing of drip irrigation system
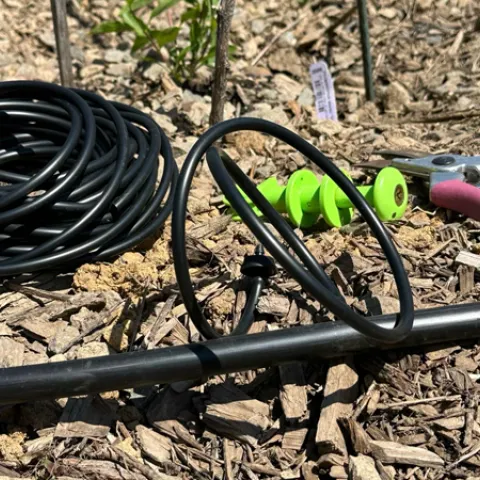
Drip irrigation uses a network of plastic tubing to carry a low flow of water to plants

Drip irrigation is also waterwise, reducing loss by evaporation and runoff and maintaining a desirable balance of air and water in the soil through slow application of water to plant roots.

What can go wrong with drip irrigation?

Whether installed by professionals or as a do-it-yourself project, drip irrigation requires routine maintenance. It’s recommended that the lines be checked monthly when the system is operating. It is especially critical when the drip irrigation is first turned on in the spring. Here are some common problems to look for:

  • Leaks. The dreaded geyser is a sure sign that there is a break in the line somewhere. It could be a dislodged emitter or a damaged line. Thirsty rodents like to chew on the tubing and lines can be unintentionally broken by shovels and spades.
Image
Digging to find leak in buried irrigation tubing
Finding the source of an irrigation leak can require some digging.

Finding a wet spot where there is no emitter can signal a problem in the supply line. If the line is buried, it will take some digging to find the leak. This was a recent problem in the Edible Demo Garden. The drip irrigation was installed some time ago and it was unclear which lines led to which bed. The search for this particular leak is still continuing.

  • Blocked lines and emitters. Lines may get clogged, and emitters can be plugged by debris, mineral buildup, and algae. Pinched lines, especially the smaller feeder lines, can also be a problem. Periodically walking the circuit and checking flow from the emitters while the system is running is a good way to spot irrigation problems before plants start showing signs of distress.
  • Low water pressure. Drip irrigation operates at 15-25 pounds per square inch (psi) which is much lower than sprinkler systems which can require up to 50 psi, and household systems running at 50-80 psi. A pressure regulator is needed to reduce the incoming household pressure to that for which the drip systems are designed. However, pressure in the lines can be lowered further by elevation gain, friction in the tubing, and long line lengths. It is recommended that 1/2” supply lines be limited to 200 feet in a single zone and the number of one gallon per hour emitters per line not exceed 200. If a drip emitter at the end of a line is not delivering sufficient water, it could be a low-pressure problem.
Fixing drip problems
Drip irrigation repair kit
An emergency drip repair tool kit keeps supplies handy when needed.

With the right supplies, many common irrigation problems can be easily fixed. An emergency drip repair kit should include spare flow emitters of different sizes, connectors (both straight and elbow), line plugs, end caps, and tubing. It’s also handy to have a tool for cutting tubing, a punch to make holes in 1/2” line, and metal staples for securing the lines. The same supplies are useful when drip lines need to be added for new plants.

Lines can be flushed to remove debris, and clogged emitters can be cleaned or replaced. Small holes in lines can be plugged. Larger damaged sections in lines can be removed and connectors used to join the undamaged sections.

A water pressure test gauge, available at hardware stores, is helpful in determining if the pressure in the drip system is in the right range. Low pressure problems due to overly long lengths of supply line or too many drip emitters might involve changing the drip line layout or adding another zone to the system.

Controlling drip irrigation

Drip systems require control valves to direct water into the system. These are generally automated with an AC or battery powered controller/timer that makes it easy to set irrigation frequency and duration. These devices range from simple timers to more complicated “smart” controllers. All these devices include the option to run the system manually, allowing gardeners to conduct their periodic system maintenance checks.

Click here for more information on irrigation systems.

UC Marin Master Gardeners

April 2025: The Joys of Selecting and Planting Seeds

Primary Image
Seed packets
Body
Image
Seed packets
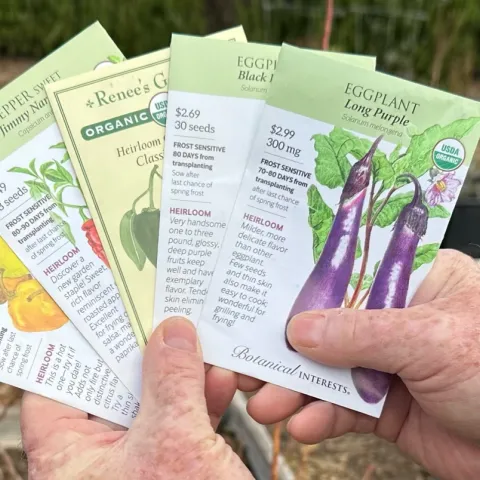
Selecting from the many varieties of certified organic seeds is part of the fun in planning a summer garden.

It’s hard to find a gardener who doesn’t love checking out new seed varieties and anticipating the abundant and tasty harvest they promise. The photos and descriptions are tantalizing and the names intriguing. Who wouldn’t be curious about a pumpkin variety called ‘Abominable’, a pepper named ‘Frodo’, or a tomato tagged ‘Dancing with Smurfs’?  With so many seed varieties to select from, narrowing down the choices can be challenging. In January this year, a team of EDG volunteers had a lot of fun picking out varieties for our spring and summer crops.

How Seeds are Selected

Seed selection starts with a garden plan, taking into consideration the space available for each type of crop. Once decisions are made about which crops to plant and where to plant them, choosing the right varieties becomes the focus. The Demo Garden is the perfect place to try out some of those new and different seed options while continuing to plant those varieties that have proven to be reliable. Planting more than one variety of each crop makes it possible to directly compare them in terms of growth and productivity.

Time to maturity is important in determining which summer crop varieties to plant. The soil must be consistently warm (over 55 degrees) for the time specified in the variety description to produce a crop. The climate in the Indian Valley Organic Farm and Garden where the Edible Demo Garden is located provides a long enough growing time for most summer crops. However, varieties requiring more than 120 days to maturity may not achieve full production before the weather turns cool.

Seeds planted in the Edible Demo Garden must be organic certified. Organic seeds are from plants grown in compliance with federal standards which exclude the use of synthetic fertilizers, pesticides, and genetically modified technologies. Seed choices for the Demo Garden are often based on the descriptions provided by organic seed companies and it’s up to the volunteers to determine which varieties seem well suited for the garden conditions and promise the best taste.

Planting the Seeds
Planting seeds in seed flats
Seeds are planted in flats filled with starting soil mix. Vermiculite is added on top to control moisture.

On February 27th, the new MMG training class got hand-on practice in seed starting. Seeds are planted in a starting soil mix in flats of cells with 2 or 3 seeds per cell. Supervised by EDG volunteers, the trainees planted 60 cells of cucumbers (‘Armenian’, ‘Crystal Apple’, ‘Jin Yang’ and ‘Early Fortune’) and 90 cells of sweet peppers (‘Pusztagold’ and ‘Bacskai Feher’), along with 30 cells of green onions and 72 cells of lettuce. The class will have the chance to take some of the cucumber and pepper starts home to plant in their own gardens where they can assess how well they grow in our different microclimates. The planted seeds are now germinating in the greenhouse.

Seed flats in greenhouse
The controlled light, moisture, and heat in the greenhouse provides the perfect environment for the seeds to germinate.

Starting plants in the greenhouse gives them an advantage and allows better timing for optimum crop production. They are not ready for transplanting outside until they have developed at least one set of true leaves. The first set of leaves to appear are embryonic leaves called cotyledons. They look different from the plant’s typical foliage. True leaves are the more recognizable leaves that develop above the cotyledons. The time required for seedlings to be ready for transplanting varies. Beans can be ready in 3 to 4 weeks while peppers can take more than 8 weeks.

New Varieties in the Demo Garden
Sprouted seedlings
Seedlings are nurtured in the greenhouse until they develop at least one set of true leaves.

EDG volunteers look forward to growing the new seed varieties they have selected for the summer. The seeds have been ordered but not all have been planted. ‘Dancing with Smurfs’, an indigo-colored cherry tomato, along with ‘Altai Orange’ and ‘Woodstock’ are among the new tomato varieties. Two new melon varieties, ‘Sweet Freckles’ and ‘Farthest North Galia’ will be tried in the garden. The ‘Pusztagold’, and ‘Bacskai Feher’ peppers, now germinating in the greenhouse, are small, sweet Hungarian type peppers. Last summer’s pepper crop included an overabundance of hot peppers, so it’s sweet peppers in demand this year.

Starting with seeds is rewarding. There is the pleasure of choosing seeds from the many available varieties and the joy of nurturing them and watching them grow into tiny plants. It’s even better when the veggies and fruits turn out to be as yummy as the seed descriptions promise.


Click here for more information on planting from seeds.

UC Marin Master Gardeners

February 2025: Choosing the Right Garden Tools

Primary Image
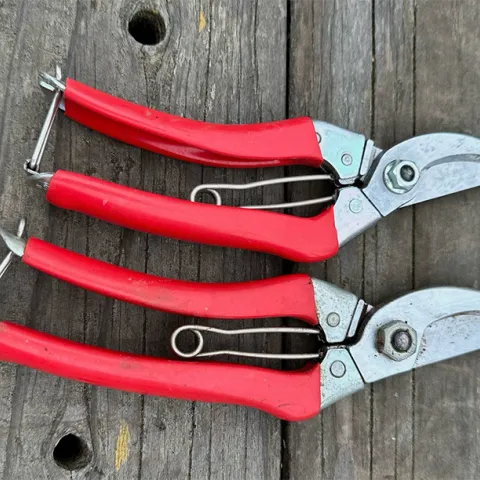
There are many choices in by-pass pruners with models that fit different hand sizes.
Body

In January, the 2025 Marin Master Gardener training class was welcomed into the Edible Demonstration Garden for a discussion and demonstration on the use and care of garden tools. The right tools make the difference between gardening that is pleasurable and gardening that is a struggle. Your first experience with a garden tool might have been that pointed stick you used when digging in the dirt as a child. Now as a gardener, you are presented with an array of better tool choices, some essential for basic garden work and some designed for specific tasks. There are tools for pruning, tools for digging, tools for raking, and tools to make gardening easier. Here are some of the more popular tools in those categories.


Pruning Tools
  • Tools 1

    Hand pruners are the favorite tool for most home gardeners. They are the tools used most often for cutting and thinning small branches to maintain plant health and appearance. They are also used for cutting flowers and harvesting vegetables. By-pass pruners, which work like scissors, are best for making clean cuts on living plants. Anvil pruners crush branch tissue and are good for removing and cutting up dead branches.

  • Pruning saws are used to remove branches larger than what hand pruners can remove. They can have a fixed or folding blade.
  • Loppers are long-handled by-pass pruners that can help access higher and hard to reach branches. The long handles also provide leverage to enable pruning thicker branches.


Digging Tools
  • Tools 2

    Trowels are essential for digging, planting, potting, and weeding. A trowel is a spade-shaped hand tool with a slightly scooped blade.

  • Garden knives are a type of trowel with a sharp narrow blade and a pointed end. One blade edge is usually serrated. Hori-Hori garden knives are a Japanese design that has proven to be so useful for digging and weeding that the name is often applied to any type of garden knife.
  • Shovels and spades are long-handled digging and soil lifting tools with the shape of blade and the length of the handle determining their particular uses.


Raking Tools
  • Rakes are useful for cleaning up leaves, removing debris, and spreading out soil amendments like compost and mulch. Hand rakes are great for getting into small spaces. Rakes with flexible, fan-shaped tines work well for cleaning up lighter debris and are sometimes called leaf rakes. Garden rakes have larger stiff metal tines and are intended for heavier use in soil or larger debris.
  • Forks are used for raking out stones and weeds. Like a dinner fork, a garden fork has four strong tines which can push easily into the ground and enable it to double as a digging tool for loosening and turning over the soil.


Gardening Comfort Tools
  • Tools 3

    Gloves provide the hand protection every gardener needs. They are a barrier against pricks, cuts, abrasions, blisters, insect bites, and other skin irritations. While most gardeners don’t mind getting their hands dirty, getting jabbed with a nasty thorn is not only painful, but it can also lead to serious infections. There are many types of gloves to choose from depending on the type of protection required. Most important is that they fit well and are comfortable to wear.

  • Kneelers cushions protect the knees when planting, weeding, and performing other low to ground garden tasks. Kneelers made of rectangular shaped heavy foam are the simplest type. However, kneelers with handles that are lightweight and easy to fold up can make the up and down movements around the garden easier. Some even flip over to form a bench.
  • Ergonomically modified tools can help gardeners get more done with less effort by enabling good body alignment and reducing joint strain. Grips should be comfortable to hold and keep hands and wrists in natural positions. Handles should be the right length to enable good posture without excessive bending and twisting.


Tool Care

Tools need to be kept clean, sharpened, in good repair, and organized to keep them working well. Surface dirt and dried sap should be brushed or washed off after each use. Periodically applying a light layer of oil will reduce rust. Pruners need regular sharpening and should be sanitized with a 10% bleach solution following contact with diseased plant material. Storing tools in dry place where they can be easily accessed will ensure they are ready for work when you are.


Click here to learn more about choosing and caring for garden tools.

UC Marin Master Gardeners
Primary Image
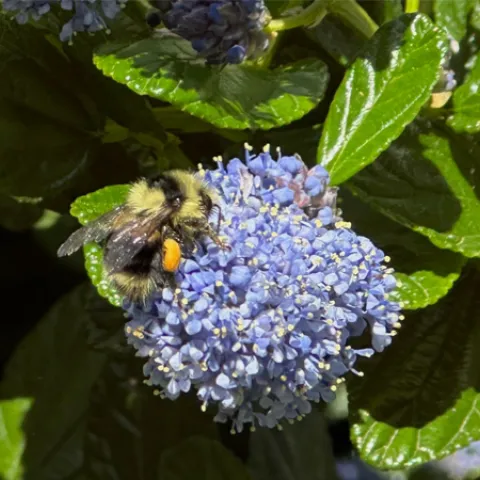
Ceanothus blossoms attract native California bumble bees.
UC Marin Master Gardeners: Article

January 2025: Natives in the Edible Garden

December 19, 2024
Natives are welcome in the Edible Demo Garden. As a joint project with the Native Plant Guild in October 2021, garden volunteers planted a variety of sun-loving, drought-tolerant California natives in a corner of the garden area...
View Article

December 2024: Giving the Garden a Rest

Primary Image
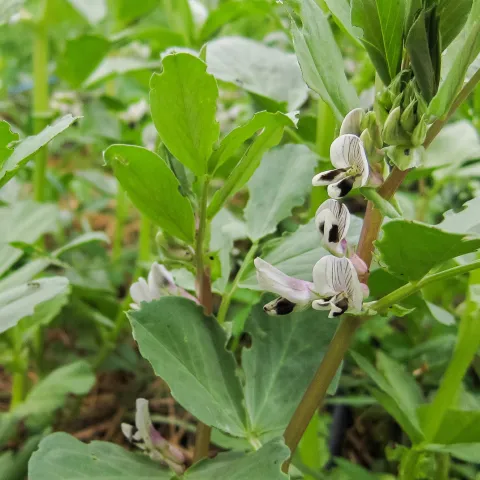
Fava beans are an attractive and popular cover crop due to their nitrogen-fixing effects in the soil. Photo: Flickr
Body

Covercrop 1
After an especially busy summer and fall harvest season, it was time to consider what to plant next in the Edible Demo Garden. In Marin it’s possible to grow vegetables year-round and there are plenty of winter crops such as cabbage, cauliflower, and onions to select. However, another option is to not plant anything during the winter months and give the garden beds some time to rest and rejuvenate. This puts the focus on caring for the soil so that when it comes time for spring planting, the garden will be ready. With this plan in mind, the recent off-season activities for the Edible Demo Garden volunteers have concentrated on methods for giving the garden time to rest. The primary options for resting the garden are planting cover crops and allowing some beds to be fallow for a season.


Planting cover crops

There are many advantages to planting cover crops. Cover crops, sometimes referred to as “green manure”, are an excellent way to protect and improve soil. They increase organic matter, suppress weeds, prevent damage from wind and water erosion, and support beneficial insects and earthworms. Plus, they can look attractive while nurturing the garden.

Covercrop 2
Cover crops are divided into two main categories: legumes, such as clover and fava beans, and non-legumes, like rye and buckwheat. Legumes have the added benefit of fixing nitrogen by taking it from the air and converting it into a form to be used by plants. Cover crops are turned over when they start to flower and allowed to decompose prior to spring planting.

Two different cover crops were chosen for the Edible Demo Garden. Fava beans were planted in several of the garden beds and in the straw bales used for the summer crops. The latter is an experiment to determine if there is sufficient residual fertility in the straw bales to support another crop. In order to aid in germination and enhance their nitrogen fixing effects, the fava bean seeds were soaked in an inoculant containing rhizobacteria prior to planting. As an alternative cover crop, a green manure mix of bell beans, field peas, and purple/hairy vetch was planted in some of the raised beds. Past experience with crows eating the sprouting seeds necessitated the use of compost, straw, and protective netting to give the cover crop seedlings a fighting chance. The effectiveness of the different cover crops will be tested in spring when it is time to plant again.


Allowing beds to remain fallow

Covercrop 3
Taking a garden plot out of the crop rotation for a season can give the soil time to naturally replenish nutrients. It can also be a way to discourage pests, prompting them to move on once their food source is gone. However, fallow garden beds can also invite weeds and leave the soil exposed to the elements. In the Edible Demo Garden, layers of compost and straw were added to suppress weeds and protect the soil in the beds designated to be fallow. The winter rains will keep the soil moist and provide a habitat for earthworms and beneficial microbes.

Click here for more information on cover crops and soil enhancement in the off-season.


UC Marin Master Gardeners