Over the years I have encountered all the potato growing FAILS in my attempts to grow beautiful potatoes in Contra Costa County. First year…Clay soil smothered my sad seedlings. My next attempt was grocery store potatoes in a hilled bed of potting mix which resulted in beautiful potatoes with a rust disease inside.
The next effort, using certified seed potatoes in a newly hilled bed, never had a chance with an infestation of moles and gophers. Not one to surrender, I built raised beds with metal hardware cloth on the bottom and the first season the beds yielded a decent crop, but the next year I was greedy, planting more seed potatoes too close together and producing hundreds of tiny potatoes the size of marbles.
Then I ventured into container growing using burlap bags. This had a better result, but the bags rotted out before harvest and the largest potatoes were exposed to sunlight, turning them green and toxic. More recently I have experimented with five grow bags and was happy to finally be rewarded with a delicious crop of three different varieties of potatoes. Grow bags seem to be the right solution in my location, with my garden’s challenges. Perhaps it will work for you.
Grow bags have several advantages over the other types of containers. Grow bags are reusable, permeable (allowing plants to breathe and prevent waterlogging) and work in small spaces. Another advantage to grow bags is that during the “hilling” process of growing potatoes, you can roll down the top four to six inches of the bag to start the potatoes. Hilling is filling only a part of the container, letting the plants grow, then adding 3-4 more inches of soil at a time covering about a third of the stem each time, until the soil reaches the top of the container. This method encourages the plants to make more potatoes, which form along the buried portions of stems.
What You'll Need on Planting Day
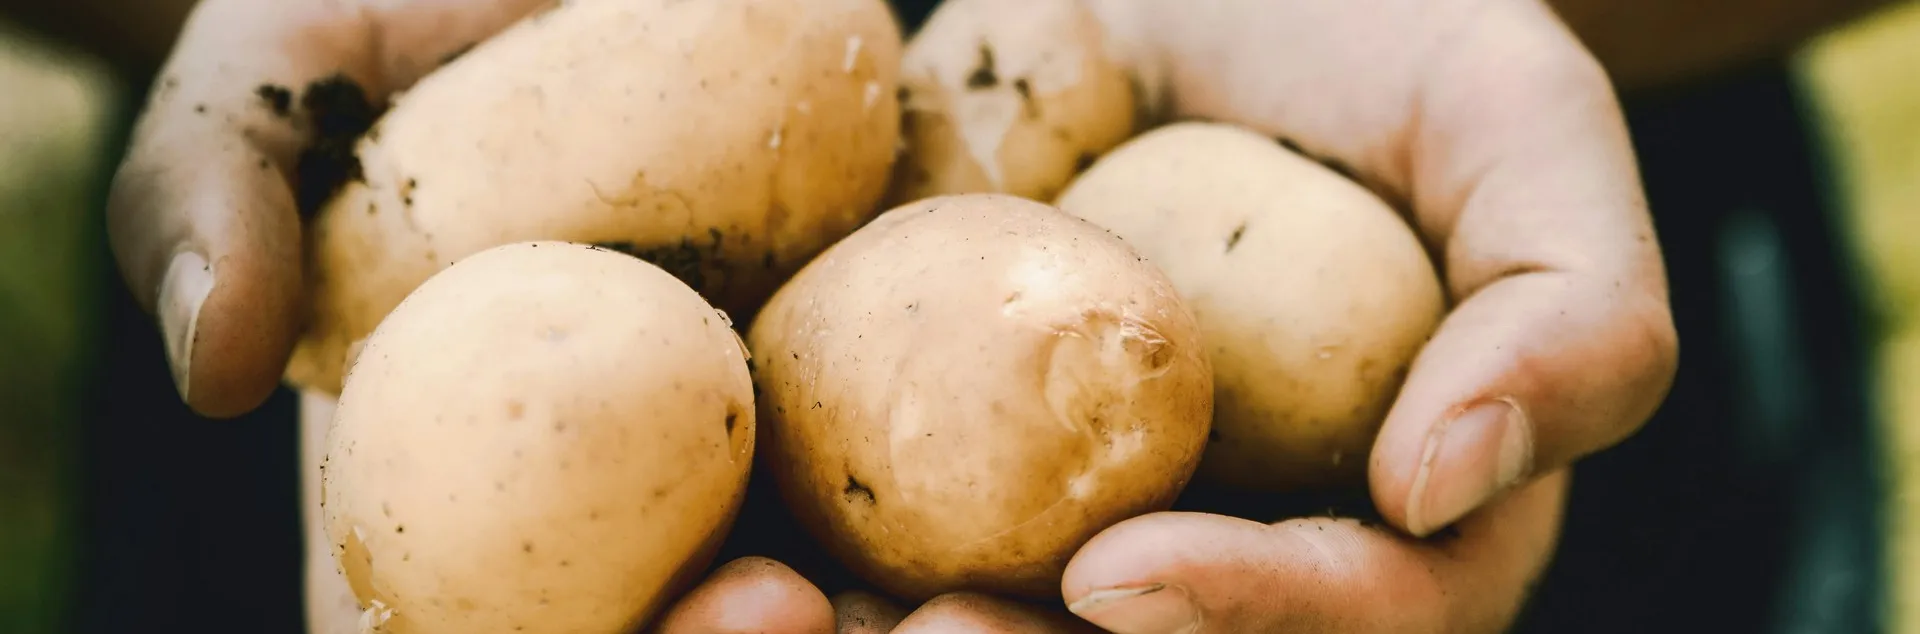
- Seed potatoes: Explore potato varieties to choose the best for your needs. Potatoes are grown from other potatoes, and if you have ever had potatoes sprout in your kitchen you know how readily this happens. Do not use grocery store potatoes for planting because they may introduce diseases into your garden. Buy certified seed potatoes from a reputable local nursery or do an online search for “certified seed potato.” Many varieties are available, including russets, white potatoes with thinner skins, “fingerlings,” and multicolored mixes in white, yellow, red, and even blue.
- Grow bags: Grow bags are available online and in nurseries. The larger size (at least 12” tall) will allow you to grow more plants, but remember that once they are filled with soil, the larger bags will be very heavy.
- Soil: The ideal soil for potatoes is sandy loam – not a common soil type in Bay Area gardens – but because potatoes are shallow‐rooted, you can create the right soil type with a good planting mix and lots of compost.
- Granular fertilizer: Before planting, work a fertilizer labeled 5‐10‐5 or 10‐10‐5 into the soil, following the recommended application rates on the package.
Pick the Season and the Site
- Plant potatoes when the danger of frost has passed. Seed potatoes can be planted from February through April, and a second crop can be planted in July or August. Select the sunniest site possible. All-day sun is best, but as little as 6 to 8 hours will do. Keep in mind that you will need to water the grow bag regularly, especially if rainfall is insufficient. If drip irrigation is available, watering can be adjusted at the start of planting and checked periodically during the growth cycle.
Prepare the Soil
- Put the soil in a wheelbarrow or tub that can hold it all at once. If you have chosen potting mix that does not have fertilizer in it, add granular fertilizer and compost. Moisten the soil and mix thoroughly. Only about one-half of the soil will be used on planting day. The rest will be used as the plants grow. Set it aside.
Prepare the Seed Potatoes
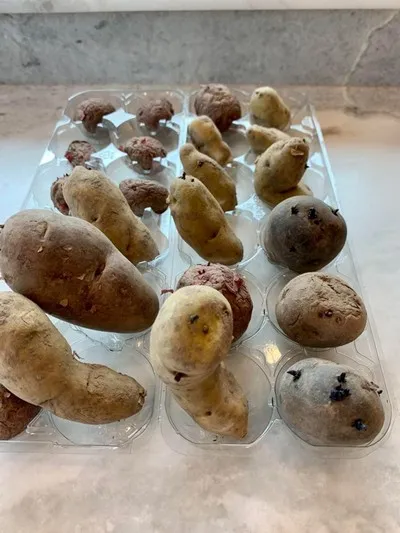
- The process of “chitting” potatoes is recommended but not required. Research shows that the process encourages a faster start to growth and better yields. However, chitting is optional as seed potatoes will eventually grow even if they are not put through this process. Chitting potatoes means pre-sprouting seed potatoes in a cool, bright, frost- free spot before planting, allowing them to develop short, sturdy shoots (chits) for a head start in the garden. The difference between potatoes sprouting in storage in the dark and chitting is that the sprouts are sturdier and less likely to snap off. Gardeners place potatoes in trays, often egg cartons, with the "eyes" (buds) facing up, encouraging strong sprouts that give the plant a boost once planted in the ground.
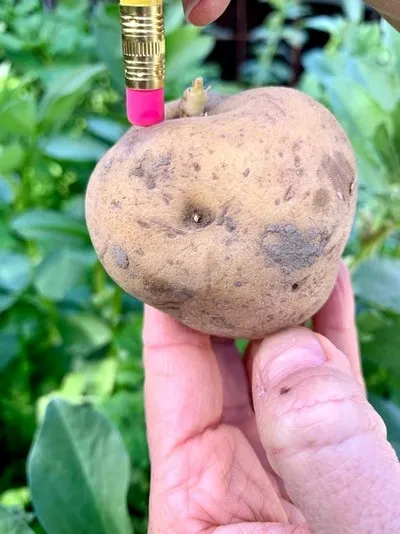
- Cut large seed potatoes into chunks at least 2-ounces — about the size of a lime- making sure that each section has at least one eye. If your seed potatoes are smaller, you can plant them whole. Store cut pieces at room temperature and preferably in a humid place to 2 days before planting to allow the cut surface to form a callus and prevent rotting.
Plant Your Potatoes in the Grow Bag
- Fold down the top edge of the bag to form a 4-6” cuff. Fill the bag with the moistened soil mixture until it’s about 4” deep. Place the seed potatoes on the soil surface, spaced evenly about six inches apart with an eye or chit pointing up. Cover with another 3” of soil. Avoid the layering method of planting another layer of seed potatoes in the same bag as this will result in tiny potatoes because of competition for space.
- “Hilling” Potato Plants, Covering with More Soil: Once the plants have grown to about 8” it is time to hill the plants, adding enough soil to bury about one-third of the height of the main stems. Unfold the edge of your grow bag, add about 4” of the soil mixture, then water in thoroughly. It’s OK if some of the foliage gets covered — any buried stems will begin producing more potatoes.
- Repeat, Adding More Soil Every 8” of Growth: Let the plants grow, then add 3-4 more inches of soil after they reach 8″ tall. Repeat the process until the soil reaches the top of the container or you run out of soil mixture. Once the plants form blossoms it is time to stop hilling the plants.
How to Care for Your Potatoes
- Water regularly: The porous fabric allows the grow bag to breathe, which prevents overheating and overwatering. However, it is important to check the moisture level in the bag because it can dry out quickly. The soil should feel moist, not soggy. In the hottest part of the summer, it might be necessary to water every day. Potato plants need frequent light watering, or the result will be knobby potatoes and multiples. Alternate wet and dry conditions can also cause hollow heart or cavities near the center of the potato. Water often enough to keep the soil consistently moist. A drip system is ideal for this. Mulching the beds (containers?) will also help maintain soil moisture.
- Fertilize: Light but frequent applications of a balanced fertilizer once the plants are three to four inches tall will increase yield. Use a fertilizer labeled 5‐10‐5 or 10‐10‐5 and follow the application rates on the package. Scatter dry fertilizer on the soil surface near the drip tubes, or where sprinklers will dissolve it if you’re using sprinklers. Potatoes don’t require training or pruning but pinching off flowers as they appear will help direct the plant’s energy toward potato production. Pull any weeds carefully to avoid damaging the roots of the potato plants.
- Maintain soil cover or mulch over tubers as they expand. Tubers exposed to light may have bitter-tasting green areas and should not be eaten as they can be toxic.
- Watch for pests: Potato plants can be afflicted with a number of pests such as aphids, flea beetles, slugs, snails, and potato tuberworms to name a few. The damage they inflict can be severe. Monitor your plants for infestations by looking at the undersides of leaves and stems as well as the tops. Additional information about pests that bother potato plants and how to deal with them can be found at: https://ipm.ucanr.edu/home-and-landscape/potato/index.html
How to Harvest Potatoes
- Look for the signs: Pay attention to watering and the plant will flower and grow vigorously through the summer. Toward the end of the season, however, the leaves will start yellowing and the stems will wilt. At this point, stop watering and wait a week or two. After that, the potatoes are ready to harvest. Potato plants usually look shabby just before it’s time to harvest.
- Empty the bag — plants, soil and all — into a wheelbarrow. Dig through the soil and pull out the potatoes. You can expect to harvest about 7 lbs. of potatoes, although you could get as much as 13 lbs. in a good year. Add the old soil to your garden or compost pile. Clean out the bag and save it for next year. It is recommended that you screen tiny potato seeds from the used soil to avoid growing plants wherever you use the soil or compost.
How to Store Potatoes
- In late summer when the potato foliage has died back, your potatoes can be dug and “cured” for storage. Curing toughens up a potato’s skin and extends its storage life. Cure the tubers by laying them out on newspaper in a well-ventilated place that is cool (50 to 60 degrees F.) and dark (so they don’t turn green). After about two weeks, the skin will have toughened up. Rub off any large clumps of dirt (potatoes should never be washed before storage) and cull any damaged tubers, which should be eaten, not stored. Treat the tubers very gently so as not to bruise or cut them.
Experimenting with grow bags may be the trick for you if you encounter any of the gardening challenges mentioned above. A good way to track progress and avoid repeating the “FAILS” is to journal or log notes every season about your efforts.
For More Information: The following web sites and publications can tell you more
about growing potatoes in general:
Potatoes are a Perfect Winter Crop: https://ucanr.edu/site/uc-master-gardener-program-contra-costa-county/article/potatoes-are-perfect-winter-crop
A recent UC Master Gardener Webinar: Growing Potatoes at Home:
https://youtu.be/tnWrn1XscD0?si=C7UAyikfrrtAxlAb
Help Desk of the UC Master Gardeners of Contra Costa County (KAD)