UC Master Food Preserver Newsletter

In November of 2024, the UC Master Food Preserver Program launched a monthly newsletter that delivers recipes, how-tos, and food preservation inspiration straight to a subscriber's inbox. Subscribe to the newsletter here.
Do you have a correction, suggestion, or story to share with the newsletter team? Share corrections, suggestions, or stories here.
Past Newsletter Full Emails
2026
2025
2024
Monthly Articles To-date
Newsletter Naming Contest - We have a Winner (March 2025)
Travis Alexander, UC Master Food Preserver Online Program Coordinator
Thank you to everyone who participated in the three-month process of finding a name for our monthly newsletter.
After receiving 34 submissions for names, dwindling the list down internally to the top three, and then collecting public rankings of the finalists, we are proud to announce that the official name of the newsletter will be: Save the Season.
The individual who submitted the winning name will be contacted soon regarding the prize for this contest. Watch for more contests and surveys in the future.
Seven Ways to Preserve Citrus (February 2025)
Joy Agcongay, UC Master Food Preserver Volunteer Online Program
Citrus peels, juice — and even leaves — can be preserved multiple ways for long-term storage and future use when not in season.
- Candied Citrus Peels
Transform citrus peels into sweet treats by candying them. Simmer the peels in a simple syrup until tender, then dry them for a chewy texture. These make great snacks, garnishes for desserts, or additions to baked goods.
Resource: UC ANR's Candied Citrus Peel Recipe
- Freezing Juice and Zest
Freeze freshly squeezed citrus juice in ice cube trays for easy portioning. (Hint: freeze in pre-measured amounts, e.g., 1 Tbs.). Citrus zest can also be frozen — just grate it, pack it into small containers, and freeze it to add a burst of brightness to your recipes. Freezing zest in a small amount of juice will help retain flavor.
Pro Tip: It’s easier to zest before juicing. Zest your citrus to maximize use and minimize waste.
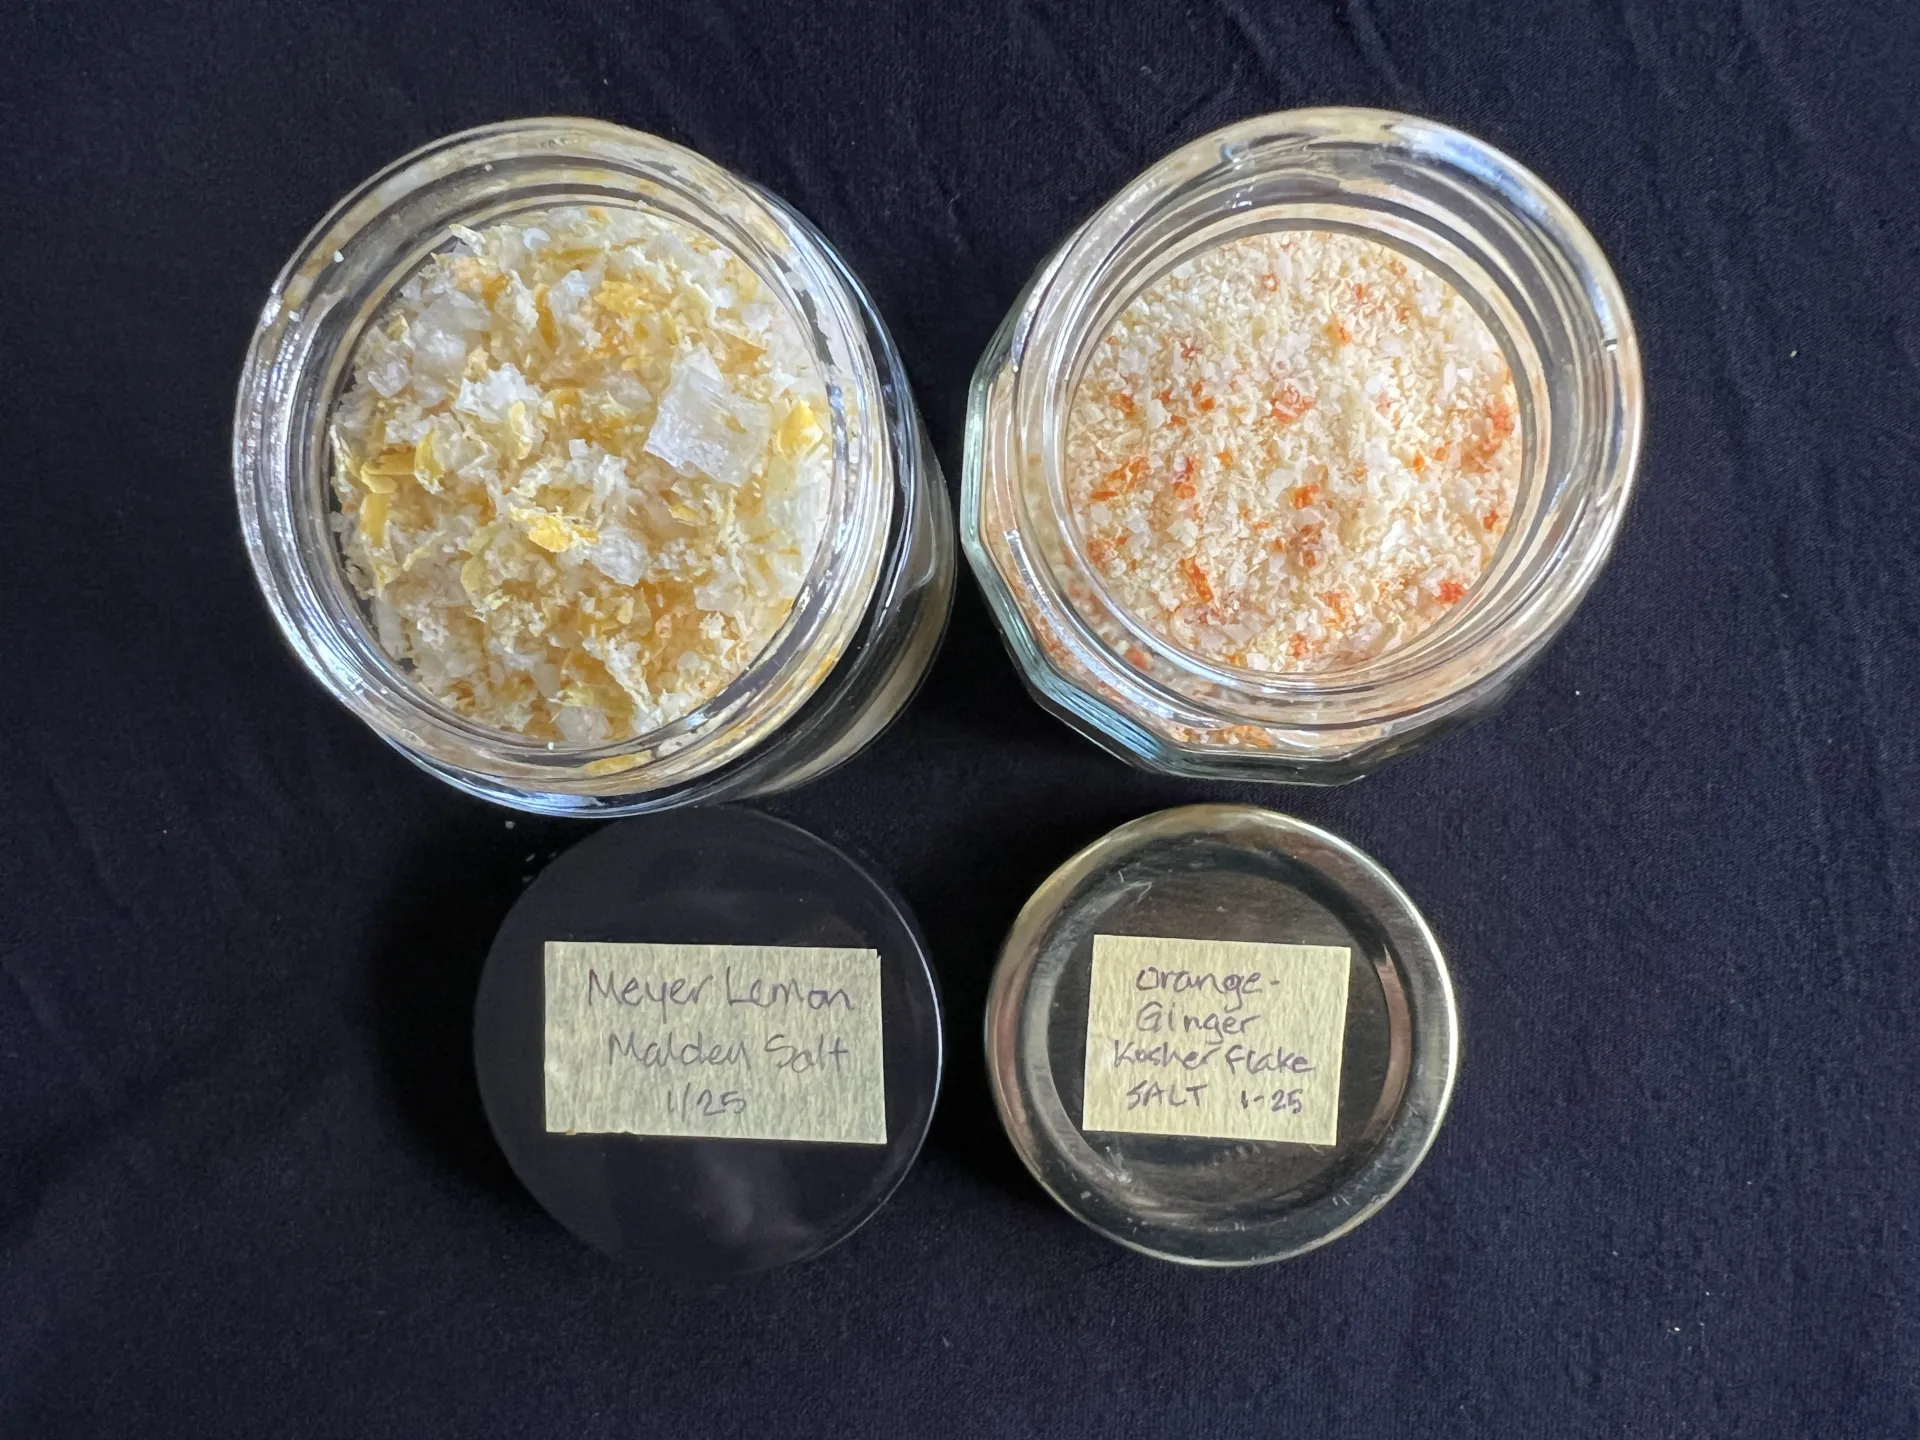
- Citrus Salts and Sugars
Mix citrus zest with salt for quick and easy flavor enhancers. Citrus salt works wonders on seafood, vegetables, or cocktails. Citrus sugar adds a fragrant touch to baked goods and beverages.
- Dehydrated Citrus Slices
Dehydrated citrus slices make for stunning cocktail garnishes, flavorful tea additions, and even decorative elements for baked goods and home decor. Dry them in a dehydrator or oven at a low temperature until brittle with a leathery texture, or grind them into powder for spice blends and rubs.
Storage Tip: Keep dehydrated slices in airtight containers with food-safe desiccant packets to maintain crispness.
- Preserved Lemons
Preserving lemons in salt creates a tangy, savory product used in perfect for Mediterranean dishes. While many use the softened rinds, you can also use the pulp to add depth to dishes.
Resource: UC ANR's Preserved Lemon Guide
- Jellies and Jams
A fun way to use citrus is to turn it into a sweet spread by making marmalade, jelly, or jam. These are perfect on toast, pastries, and paired with cheese.
Resource: 3 Ways to Make Orange Marmalade
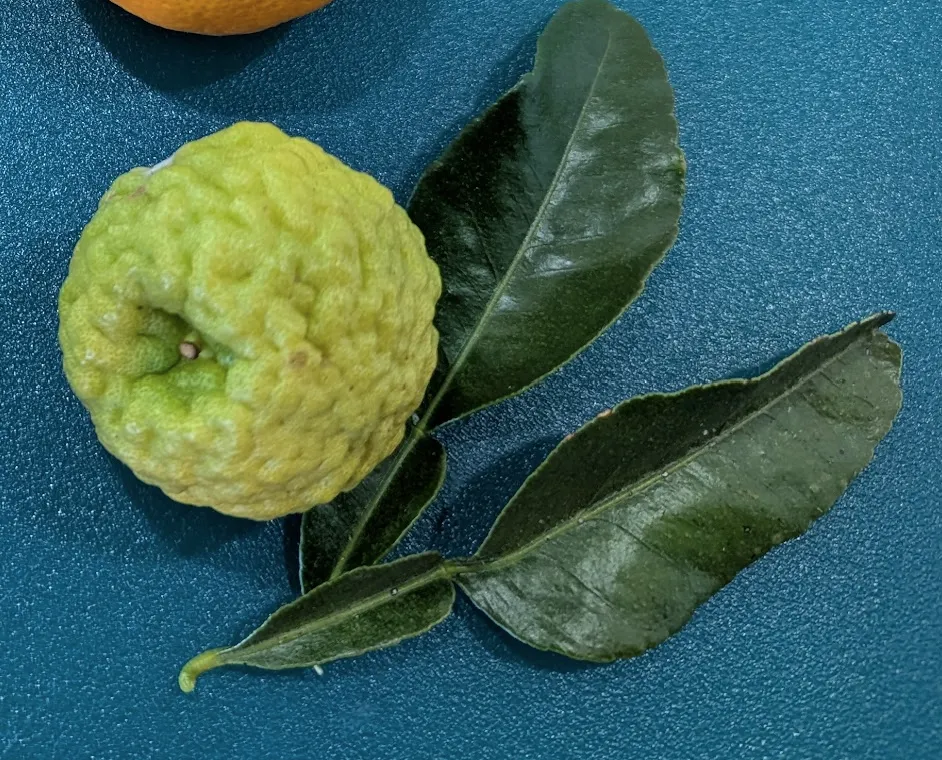
- Preserving Makrut Lime Leaves: Air Drying and Freezing
Makrut lime leaves are a key ingredient for Southeast Asian cooking. They are a wonderfully fragrant ingredient packaged as a distinctive double-lobed leaf. They can be preserved by air drying or freezing. Use in curries, soups, broths, and rice for flavor and aroma.
Experiment with any or all the ways to preserve, and enjoy citrus season all year long!
- Air Drying:
- Wash the leaves thoroughly and pat them dry.
- Tie small bundles and hang them in a cool, well-ventilated area, away from sunlight.
- Once completely dry (1-2 weeks), store them in an airtight container in a cool dark place.
- Freezing:
- Wash and dry the leaves.
- Place them flat in a single layer in a freezer bag. Remove as much air as possible before sealing.
Spotlight: Monica Benavides, Class of 2024 MFP Volunteer (February 2025)
Monica Benavides, UC Master Food Preserver Volunteer Online Program
County of residence: Santa Clara County
- When did you join the MFP Online Program?
I graduated from the 2024 Training Program run and have been volunteering since then.
- Why did you decide to join?
I always wanted to improve my food preservation skills. I've canned, pickled, and dehydrated before, but never really felt confident in doing so. I thought learning how to safely preserve food through the UC Master Food Preserve online program would help me gain the confidence I lacked. I could then in turn help others gain confidence in their preserving practices as well.
- What has been the most valuable thing you've learned in the program so far?
The most valuable thing I've learned in this program is that I can preserve food with confidence, and I can teach others to do the same. The research-based practices I have learned in this program gives me that confidence. With so many online recipes, blogs, and videos on how to preserve food, I know that when I follow a researched-backed recipe from a trusted university source, I can be confident I've feeding my family safe food. I've also learned why these practices yield safe products.
- In what ways do you/ have you contributed to the online program?
So far, my major contribution has been serving as the facilitator for our monthly program business meetings. I greatly appreciate the opportunity to help everyone's voice be heard, move the meeting along in a respectful way, as well as celebrate our accomplishments. Moving forward, I'm eager to help deliver more classes to the public. As a teacher, this is one way I can give back to others, as well as continually practice the skills I've learned.
- What advice would you have for those who may be thinking about joining?
If you're curious about the program, I would encourage you to join one of our Q&A events. You can ask about the program to see if it might be a good fit for you as well. Maybe I'll even see you there!
Your Citrus FAQs – Answered (February 2025)
Tim Long, UC Master Food Preserver Online Program Volunteer
Why do recipes call for bottled lemon juice when preserving, when I have all these fresh lemons I can juice and use?
Bottled lemon juice is standardized, or uniformly acidified, per FDA regulations. (See article: https://blogs.extension.iastate.edu/answerline/tag/bottled-lemon-juice/) This means it is consistent at a level of safety for food preservation. The final acidity of a food product is critical to deter the growth of microorganisms that can cause spoilage or foodborne illness.
Fresh lemons have an inconsistent acid, or pH, level. This can vary due to the lemon variety, but also vary due to the level of maturity, growing conditions, soil, fertilizer, rootstock, and storage conditions. Although safe to eat fresh for a great meal, they are not the safe choice for food preservation.
How do I get the best citrus from my trees for preserving and can I store it before processing?
Unlike many fruits, citrus fruits do not continue to ripen once picked. However, if you pick over-ripened fruit, it will be more susceptible to rotting. On the other hand, you do not want to pick unripe fruit because its sweetness and nutritional value will be hampered.
You, therefore, need to pick well-ripened fruit. Always look for fruit with vibrant colors, but which are firm to touch. Greenish color on oranges might mean that they are under ripened. However, oranges with tinges of green and green lemons are okay, as they tend to keep well for longer.
Oranges store best at cooler temperatures and go bad quickly at warmer temperatures. To refrigerate them properly, place them in a mesh, as opposed to a plastic, bag. This allows air to circulate and slows down the growth of mold, lesions, or softened rind. If you place them in the veggie section of your refrigerator and turn them occasionally to allow airflow, they should remain fresh for about 30 days. You can do the same with grapefruit as well. To refrigerate lemons, however, put them in a sealed plastic bag before placing them in the fridge.
Whether you refrigerate or keep your citrus fruits on a countertop, keeping them dry is key. Bundling them together when wet encourages mold growth and lesions which could break down the peel and compromise the flesh of the fruit.
What is a kumquat?
Kumquats, sometimes called “Winter Citrus,” are a sweet and juicy fruit. Unlike most other citrus fruit, you can eat a kumquat’s rind, center, and even the seeds if you want. Seek out firm and bright orange kumquats when you’re at the grocery store.
Here is a link to a document from the UCANR (University of California Agriculture & Natural Resources) about Kumquats with some recipes: https://ucanr.edu/sites/fresnonutrition/files/14352.pdf
Newsletter Naming Contest – We need your Opinion! (February 2025)
Travis Alexander, UC Master Food Preserver Coordinator Online Program
The UC Master Food Preserver Program received 34 submissions for the newsletter naming contest. After a careful internal, anonymous review, three finalists have been identified:
- Well Preserved
- Preserve and Protect
- Save the Season
Please use the following form to rank the three finalists no later than February 28.
The winning name will be announced in March’s issue. The individual that submitted the winning name will receive a food preservation booklet collection (up to $50 value).
Spotlight: Tim Long, Class of 2024 MFP Volunteer (January 2025)
Tim Long, UC Master Food Preserver Volunteer Online Program
My name is Tim Long. I am a University of California Master Food Preserver (MFP), specifically affiliated with the Online Program. To give you an idea of how I got here in the program, I would like to share a bit about my life.
I am 78 years old. I was a late-in-life baby as my parents were born in 1900 & 1905. They lived through some very tough times in our history. World War I, the Great Depression and the Dust Bowl era, then World War II, the Korean War, and worried about me during Vietnam. As youngsters, they shared many, many stories about life during those times and how they learned to grow their own food as well as preserve much of it during many shortages. These stories along with practical experience helped develop my desire to grow food and as they used to say, “put it up” (can, freeze etc.) I also learned about gleaning things like nuts, fruits and vegetables.
This led to me being an Agriculture/college prep major in high school. I also spent 4 years in FFA and earned the State Farmer Degree. I then left home to attend Cal Poly in San Luis Obispo where I ultimately received a Bachelor of Science degree in Agriculture Business Management. After graduation and my time in the Army, life was pretty ho hum. I continued to garden and preserve as time permitted in a busy schedule of work and family.
In 2020, I received my certification as a Master Gardener in the second class available in Stanislaus County. I also wanted to train as a Master Food Preserver, but my county does not have the program. I tried for 2 years to get San Joaquin County to allow me in their program since they are the next county north of me. But you need to be a resident of the county with a program to take the training. Last year they notified me about the new Online program which was coming in January of 2024. I immediately applied and HOO RAY was accepted and am now trained.
This program has been such a fantastic opportunity to enhance my food processing skills as well as learn new techniques and finally learn more about the science involved in food processing. All the people I now get to work with are extremely knowledgeable and helpful. And of course, now my family gets to enjoy more of the fruits of my labor no pun intended.
I can’t say enough about the importance of this program, and I am so happy to be able to share what I have learned with others.
I would encourage you to at least consider joining the training program in 2026 or at least attend the orientation, so you have a better understanding of how it works.
Here is the link to more information about the online program. https://mfp.ucanr.edu/Contact/Find_a_Program/Online_Delivery_Program/
Thanks,
Tim Long
Online delivery program growing strong (January 2025)
Travis Alexander, UC Master Food Preserver Coordinator Online Program
In a week, the University of California Master Food Preserver (UC MFP) Program will officially kick off its annual training run. Applicants will receive more than 50 hours of training over the course of 16 weeks, covering food safety principles, food preservation methods, and public teaching skills. New UC MFPs are required to volunteer a minimum of 50 hours in the first year and 25 hours each year subsequently. They must also complete a minimum of 12 hours of continuing education per year, starting their second year, to maintain certification. While prior food preservation knowledge is not a requirement of acceptance into the training, willingness to teach others is. Traditionally, certification was really limited to those who resided in a county that offered a UC MFP Program out of the local UC Cooperative Extension office, as has been the case for Master Gardening. As of 2024, with Specialty Crop Block Grant Program funds administered by the California Department of Food and Agriculture, the UC MFP Program was able to increase accessibility by establishing an entirely online, statewide cohort of UC MFPs. These volunteers meet and educate the public entirely online, specifically via Zoom, with a focus on specialty crops, as defined by the USDA. As of today, the online cohort consists of 30 certified volunteers, from Santee to Chico, and as of this day next year, the cohort could be double in size given the number of trainees in the 2025 run.
Below is a bit more background on the SCBG project that has increased accessibility to food preservation education statewide.
Title:
Provide Research-Based Online Food Preservation Educational Events for Specialty Crops
Duration:
November 1, 2023 - June 30, 2026
Summary:
As a result of the COVID-19 pandemic, more people are preserving fresh produce and then preparing meals with their preserved food. Often home canners rely on internet recipes, blogs, old canning books, and family history for preservation recipes, many of which use out-of-date and potentially unsafe methods. The University of California, Agriculture and Natural Resources, will leverage a new online-only version of the University of California Master Food Preserver model to extend science-based preparation, storage, and preservation practices to anyone with an internet connection. It will build a network of online volunteer educators to provide online helplines, education materials distributed through social media and websites, and online classes addressing safe preparation and preservation methods with research-based recipes to promote awareness and consumption of specialty crops. Project success will be measured by the increase in specialty crop knowledge and consumption reported through pre- and post-event surveys.
Objectives:
- Develop a training program for online volunteers and certify 50 UC MFP Volunteers for service (by July 2025).
- Develop a marketing and education plan for a two-year series of online specialty crop food education and preservation events and educational outreach media outlets (by June 2025).
- Develop and conduct multiple monthly online educational events, with a goal of completing 42 events (by June 2026).
- Create an online, statewide helpline system to answer food preservation questions about specialty crop products (by June 2025).
- Create an active social media presence for the statewide UC Master Food Preserver Program with 1,000 followers (by June 2026).
- Create a statewide UC Master Food Preserver online educational newsletter with 4,000 subscribers (by April 2026).

Newsletter naming contest update (January 2025)
Travis Alexander, UC Master Food Preserver Coordinator Online Program
We are looking for an *Official* newsletter name!
The UC Master Food Preserver Program is seeking submissions to give its new monthly newsletter an official name. Please enter your ideas here for a chance to win a food preservation booklet collection (up to a $50 value). Below are a few guidelines, the original submission deadline of January 15 has been extended to January 29:
- Submit only original work
- Newsletter name should be three words or fewer
- The name should be aligned with food preservation
- The name should not include a city or landmark
- If you have a suggestion for font type, size, style, etc.., please format your submission accordingly
Food safety tips for the holidays (December 2024)
Tim Long, UC Master Food Preserver Volunteer Online Program
This is the time of year we typically have family and friends gather to share food and celebrate the holidays. Just don’t let foodborne illnesses become part of your celebrations.
Some common food safety mistakes during food preparation include:
- Not washing hands correctly
- Not cleaning or sterilizing counters and utensils properly
- Cross-contaminating containers while cooking
- Not cooking raw meat to a safe internal temperature.
But let’s assume for the sake of this article, that you already meticulously follow safe practices in food preparation.
Let’s now talk about safe handling of leftovers, which can be the biggest cause of foodborne illness. You need to be aware of the “temperature danger zone”. The temperature danger zone is the temperature range where harmful pathogens that cause foodborne illness can quickly multiply, and is between 41° F and 135° F. To be very clear, that means chilled food must be kept colder than 41° F and hot foods must be kept warmer than 135° F.
Serve Food Safely
If you are serving appetizers or snacks that will be left out for an extended period, use these tips to keep foods outside of the temperature danger zone:
- Hold hot foods in food warmers, such as plug-in trays, chafing dishes, or warming mats that use induction heat to keep foods hot (above 135° F).
- Use chiller bowls to hold dips. Fill a large bowl with ice and nestle a smaller bowl filled with the dip in the ice. You can buy decorative sets for the holidays or use bowls you already have.
- Serve small portions that you will refill or replace frequently. Serve amounts that will be eaten before the temperature of the food changes.
Store Leftovers Safely
Cooked foods like gravies, roast meats and poultry, casseroles, soups and sauces left too long at room temperature (in the temperature danger zone) and improperly reheated can easily grow bacteria. This type of foodborne illness commonly happens around the holidays.
Refrigerate or freeze perishable, temperature-sensitive food within 2 hours (1 hour if ambient temperature is above 90° F) or discard it. Break down large dishes into shallow, smaller uncovered containers to get all parts of refrigerated foods to cool to safe cold holding temperatures quickly. Freeze or discard refrigerated leftovers that can’t be eaten within 3 to 4 days.
|
Cold Storage Guidelines for Selected Holiday Foods |
||
|
Product |
Refrigerator (40 °F) |
Freezer (0 °F) |
|
Fresh Eggs, in shell |
3 to 5 weeks |
Do not freeze |
|
Soups & Stews |
3 to 4 days |
2 to 3 months |
|
Fresh Turkey, whole |
1 to 2 days |
1 year |
|
Fresh Turkey, pieces |
1 to 2 days |
9 months |
|
Giblets |
1 to 2 days |
3 to 4 months |
|
Casseroles |
3 to 4 days |
2 to 3 months |
|
Gravy & Broth |
3 to 4 days |
2 to 3 months |
|
Stuffing, cooked |
3 to 4 days |
1 month |
Source: University of Nebraska-Lincoln
Reheat leftovers safely
It is safe to reheat frozen leftovers without thawing, either in a saucepan or microwave (in the case of a soup or stew) or in the oven or microwave (for example, casseroles and one-pot meals). Reheating will take longer than if the food is thawed first, but it is safe to do when time is short.
Reheating tips:
- Reheat all leftovers to at least 165° F before serving (as measured with a food thermometer).
- Reheat sauces, soups and gravies by bringing them to a rolling boil.
- When reheating in the microwave, cover to retain moisture and rotate the food for even heating. Arrange food items evenly in a covered microwave-safe glass or ceramic dish and add some liquid if needed. Be sure the covering is microwave safe and vent the lid or wrap to let the steam escape. The moist heat that is created will help destroy harmful bacteria and will ensure uniform cooking.
- Also, because microwaves have cold spots, check the temperature of the food in several places with a food thermometer and allow resting time before checking the internal temperature of the food with a food thermometer.
We hope this information will help you and yours have a safe eating adventure together during the upcoming holidays!
References:
https://www.ehs.washington.edu/about/latest-news/food-safety-tips-holidays
https://www.foodsafety.gov/blog/thanksgiving-leftovers-safe-keeping-weekend-grazing
https://food.unl.edu/article/holiday-food-safety-tips
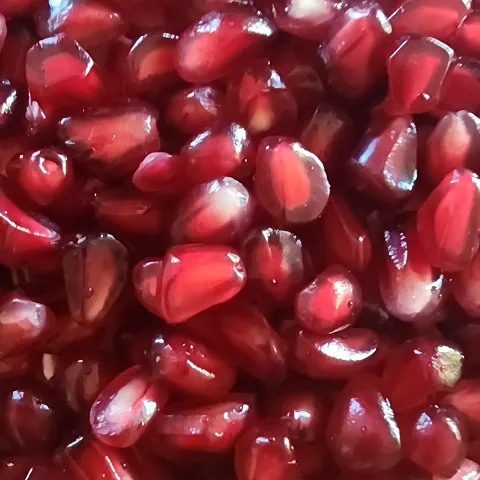
Pomegranates: juicing, freezing, and making molasses
Henry Shaw, UC Master Food Preserver Online Program Volunteer
Pomegranate (Punica granatum) is a wonderful seasonal fruit that is available fresh in the late summer to early autumn, providing us with jewel-like “arils” (the juicy, brightly colored covering of the actual pomegranate seeds) that are as beautiful as they are flavorful. This is the perfect time to capture and preserve their essence in the form of frozen arils, frozen pomegranate juice, or by making pomegranate molasses, a rich, tangy syrup made from pomegranate juice.
Although you can make pomegranate molasses from commercial pomegranate juice (read the label to make sure it is pure pomegranate juice with no added ingredients), if you have access to fresh pomegranate fruit, making molasses from the juice of that fruit is a wonderful way to preserve its essence.
The first step in juicing your pomegranates is to remove the arils from the fruit (i.e., “seed” the pomegranates). If you’ve never done this before, the task can seem daunting, but it’s not that hard. The next sections of this article describe how to get pomegranate arils out of the fruit, how to extract the juice, and what to do with the arils and juice once you have them. If you simply want to know how to make pomegranate molasses using commercial juice, skip over the next sections and jump to the recipe at the end of this article.
Extracting pomegranate arils
There are two basic methods to go about extracting the arils from a pomegranate. Note that for both methods, it’s best to wear an apron as you can expect some splatter of pomegranate juice, which can stain fabrics!
For the first method, cut the fruit in half across its “equator”, then hold one of the halves in one hand over a deep bowl. The fingers of the hand holding the pomegranate should be spread apart from one another. Hold a wooden spoon or similar tool in the other hand and smack the back of the pomegranate sharply with the tool. The arils should start to fall out of the pomegranate into the bowl. Continue hitting the back of the pomegranate until nearly all the arils have been released. The stubborn remaining ones can be picked out by hand. Expect the rind of the pomegranate to split up as you hit it. This method is fast, but will result in more work picking the white pith out of the separated arils in the next step.
For the second method, slice off the stem and blossom ends of the fruit, exposing the arils within. You should see areas rich in arils that are separated by white membranes, similar to citrus segments. As best you can, score the rind of the fruit along the lines of those membranes from stem to blossom end, and then tear the pomegranate apart along those cuts. Take each of the resulting sections and use your fingers to rub the arils off the white pith to which they are attached. This takes longer than the “whacking” method, but results in less white pith that needs to be removed in the next step.
Whichever method you use, the next step is to put the separated arils into a bowl with enough water to cover them by an inch or two so you can cleanly separate the arils from any remaining white pith, which is bitter. The pith will float, and the arils will sink. Remove as much of the pith attached to arils as possible by massaging the arils and skimming out the floating white pith.
Strain out the arils using a strainer or colander and dry them on paper towels.
At this point, you can freeze the arils for future use by spreading them out on a pan or plate and putting it into the freezer. Once the arils are frozen solid, pack them into freezer bags or vacuum seal them in pouches for storage in the freezer for up to a year.
Juicing pomegranate arils
Once you have the arils separated from the fruit, it’s easy to make juice. Put the arils in a blender or food processor and whirl or pulse them for a few seconds to break open the juicy sacs. Use a spatula to push down any arils that might be stuck to the sides of the container above the liquid and blend again for a few seconds. Pour the resulting mash into a fine strainer over a bowl and press on the solids to extract as much juice as possible. At this stage, the resulting juice will likely have some residual pulp/solids in it and be somewhat cloudy. This is acceptable for freezing the juice or for making pomegranate molasses, but to make the juice clearer (i.e., for making jelly), pass it through a jelly bag, perhaps repeatedly, to remove the remaining solids.
Using your pomegranate juice
The pomegranate juice can be frozen in freezer-safe containers for future use. To help maintain the color of the juice, it’s recommended, but not necessary, to add a scant ¼ teaspoon of ascorbic acid to each quart of juice. Be sure to leave ½” of headroom in the container so the juice can expand as it freezes.
You can process pomegranate juice in a boiling-water or atmospheric steam canner to make a shelf stable product; however, canned juice may turn brown and lose its flavor. Freezing is the preferred method. If you want to make shelf-stable juice, be sure to add ¼ teaspoon of ascorbic acid before processing. Use sterilized jars* and process pints or quarts for 5 minutes at elevations below 1000 feet. Process for 10 minutes at elevations between 1000 – 6000 ft., and for 15 minutes above 6000 ft.
Making pomegranate molasses
Pomegranate molasses is a staple in many Middle Eastern and Mediterranean cuisines, and its deep, sweet-sour flavor adds complexity to everything from salad dressings to marinades and even desserts. Whether drizzled over roasted vegetables, mixed into dips, or stirred into cocktails, homemade pomegranate molasses brings a touch of seasonal luxury to any meal throughout the year.
Making pomegranate molasses is very simple, but a little time consuming. It involves using low heat to reduce the volume of a mixture of pomegranate juice with optional additions of sugar and lemon juice to about 25% of the original volume. Expect that it will take 2-3 hours to reduce 4 cups of starting liquid to 1 cup of molasses.
It’s possible to make pomegranate molasses with just pomegranate juice with no additions, but it’s recommended to add some sugar as this will shorten the time needed to reduce the liquid to a syrup stage, as well as increase the yield of molasses (i.e., lower amounts of sugar will require more of the initial liquid to be evaporated). Start with the suggested amount of sugar in the recipe below. If you prefer a sweeter molasses, add additional sugar as the mixture reduces in volume. (Taste the product as it reduces.) The lemon juice is also optional, but it helps retain the color of the original juice, as well as add flavor and tartness.
It's very important to keep the juice from boiling during the process. Boiling will cause the product to turn brown and it will lose its fresh pomegranate flavor. Ideally, the temperature should be kept between 190° - 200°F as the liquid evaporates. An occasional boiling bubble is ok but lower the heat if the liquid starts to bubble vigorously.
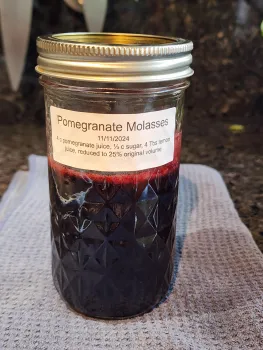
Jar of pomegranate molasses (Henry Shaw, used with permission).
Pomegranate Molasses Recipe
Yield: ~1 cup molasses
Ingredients:
4 cups pomegranate juice (fresh or commercial bottled juice with no additives)
1/3 cup white sugar (can omit or use up to 1 cup, to taste)
4 Tbsp lemon juice (can omit or use up to 1 cup, to taste)
Instructions:
Combine all ingredients in a large, heavy saucepan (a larger surface area will reduce the time needed to reduce to a syrup)
Turn on the stove and heat the mixture, stirring continuously until the sugar is dissolved. Adjust the heat to maintain a very low simmer (190° - 200°F). Continue to stir frequently until the liquid has reduced to about 25% of the original volume and is syrupy. When ready, the liquid should coat a spoon. Note that the syrup will get thicker when it cools. It will take 2-3 hours to reduce 4 cups of initial liquid to 1 cup of molasses.
Pour the hot molasses into a sterilized jar* and store in the refrigerator for up to a year.
*(To sterilize a jar, put the jar in a pot, cover completely with water, and boil for 10 minutes if you live at an elevation below 1000 feet. Add 1 minute of boiling time for each additional 1000 feet of elevation.)
This article first appeared in the December 2024 issue of Save the Season. To subscribe to the newsletter and have great content delivered to your email inbox, click the button to join our mailing list.