Fruit Trees
Growing Fruit Trees
Fruit trees need suitable climates, well-drained soil, proper planting, and maintenance throughout the season. It takes some planning and work to get them established, but once you do it's a joy to pick fruit fresh from the garden. Here's how to create your very own home orchard.
Site considerations
There are many things to consider when deciding which fruit trees are a good match for your garden, including:
• Careful evaluation of your microclimate
• Chill hours available (see below)
• Soil quality
• Access to water
• Space
• Protecting fruit from wildlife
Choosing a fruit tree
The best way to assure success is to choose fruit trees that work in your microclimate, and to grow them in the conditions they need. One important consideration is the number of chill hours required. Fruit trees (except citrus) need a specific number of cumulative hours of chilling (temperatures between 32°F and 45°F) to break winter dormancy. This varies by variety.
Preparation and planting
All edible plants require proper preparation and planting, and fruit trees are no exception. Fruit trees need proper spacing to avoid crowding and other problems. To get them off to a good start, make sure you follow guidelines for proper planting and handling.
Growing instructions
Cick on the individual trees below to learn how to grow healthy trees for sweet, delicious fruit for years to come.
> Apple
> Apricot
> Cherry
> Citrus
> Fig
> Olive
> Peach
> Pear
> Persimmon
> Plum
Pruning instructions
Pruning is different for every type of fruit tree. Most fruit trees benefit from summer and winter pruning. Refer to our full Pruning Library or click on the individual trees below for detailed tips, techniques, and timing.
Benefits of pruning fruit trees
• Controls size for easier harvesting and care
• Increases strength so weight of the fruit doesn't break branches.
• Distributes sunlight evenly throughout tree
• Regulates fruit bearing by removing excess fruitwood
• Renews fruitwood to continue strong buds and flowers
• Removes undesirable wood such as dead, broken, diseased, and crossing branches.
> HOW TO PRUNE COMMON FRUIT TREES
Maintenance
Use this maintenance schedule, which provides fruit tree care by type of tree and time of year.
Irrigation
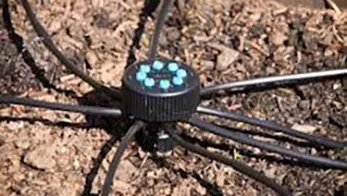
Generally speaking, fruit trees need a large volume of water -- but not every day. The correct amount of water for a given fruit tree depends primarily on the size of the tree and the heat of the day. Here's detailed irrigation advice and guidelines, including examples of how long to water using different watering methods such as drip or sprinklers.
Pollination
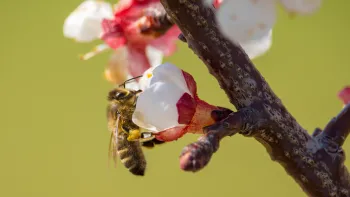
Without pollination, flowers may bloom abundantly but will not bear fruit. To avoid this frustration, learn your fruit tree's pollination requirement. This will vary depending on your tree, climate, and regional conditions.
Fertilizing
Specialized fruit tree fertilizers can be purchased at nurseries. Be sure to follow all instructions. Do not add more fertilizer to help your tree “grow faster.” Excess fertilizer could damage your tree or get washed away in storm drains.
Fruit thinning
Fruit trees often produce more fruit than the branches can hold when young, and more fruit than the tree can support as it matures. Thinning fruit or removing extra fruit when the fruit is small is key to harvesting good-sized fruit. The amount of fruit to thin depends on the species and the overall fruit load on the tree.
Stone fruits produce one fruit per bud:
• Apricots and plums are fairly small, so they should be thinned to 2 to 4 inches apart on the branch.
• Peaches and nectarines should be thinned to about 3 to 5 inches.
• If excessive fruit have been set, more thinning may be required.
• If the fruit load is light, but one or two branches have a large amount of fruit, less thinning is required.
Pome fruits (apples and pears) produce a cluster of flowers and fruit from each bud:
• Thin to no more than one to two fruit per cluster, depending on the total fruit set and growing conditions.
• Retain the largest fruit whenever possible.
• When the crop is heavy, fruit should be spaced no less than 6 to 8 inches apart.
Propagation
If you eat a delicious peach and decide to plant the seed, you will be disappointed. Fruit trees require propagation by budding and grafting, which assures quality fruit plus disease resistance and other traits. Budded and grafted fruit trees are available bareroot in winter.
Pests and Diseases
Integrated Pest Management (IPM) encourages natural predators to control pests in your garden or orchard. Nature provides a balance between plant pests and the beneficial insects that control these pests. The less we do to tamper with that balance, the more likely it is to work successfully. How does it differ from organic gardening? Proponents of IPM are not opposed to the use of chemical controls, but use them only when necessary and only in amounts and with proper timing to minimize a negative effect on the beneficial bugs in the garden.
Learn more about common pests and diseases of individual fruit trees.
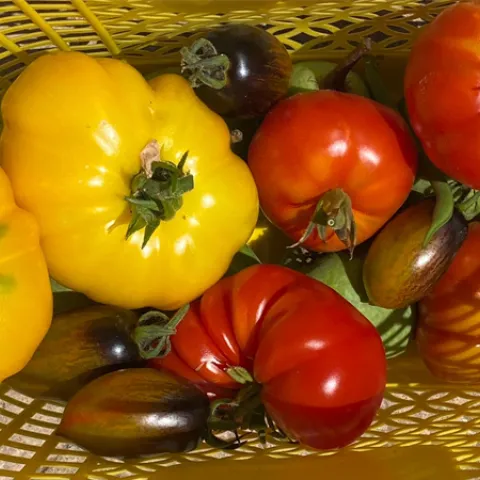
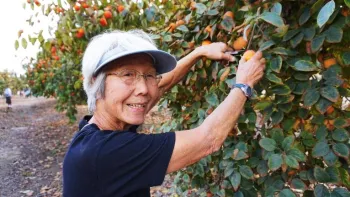
Harvest and storage
Ripening, harvesting, and storage requirements vary by the type of fruit. Taste and texture will be at their best if you use proper strategies. Here are guidelines for storage.
FRUIT TREE CARE CARDS TO PRINT & KEEP!
Use Master Gardener and master pruner Susan Pearson's pruning and growing cards for specific fruit trees common in Marin. Print them out and keep them for easy reference.
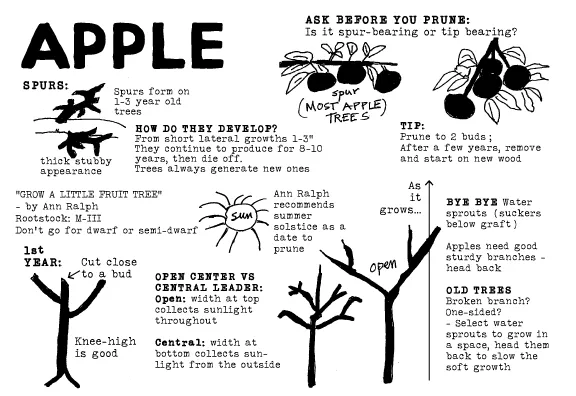
APPLE
FIG
LEMON
PEACH
PEAR
PERSIMMON
PLUM
POMEGRANATE
BACK TO EDIBLES
> What Edible Gardens Need
> Best Choices for Marin
> How to Prepare
> How to Plant
> Edibles in Containers
> Planting Calendar
> Grow & Care Sheets for Vegetables, Herbs & Fruits
> Tips & Techniques
> How to Maintain
> Fruit Trees
> Top 20 Edible Garden Problems
> Cover Crops & Soil Enhancements in the Off-season
> Conserving Water
•••••••••
Visit our EDIBLE DEMO GARDEN at IVC Organic Farm & Garden
News from the Edible Demo Garden
Seasonal Advice and Happenings at our Edible Demonstration Garden
Every month, the team at the Edible Demonstration Garden chronicles what's happening in the garden - planting, harvesting, problems and more. Check out our stories!
> BACK TO THE EDIBLE DEMO GARDEN
June 2025: Patio Gardening
This past month EDG volunteers created a small “patio” in the garden to demonstrate how edibles can be successfully grown in limited space. Too often gardeners are discouraged from growing edibles, believing that it takes a large back yard with room for long rows of plants. However, with the imaginative use of containers even a small deck, patio, or balcony can be converted into flourishing garden.
What are the basic requirements for growing edibles in small spaces?
Sun – Edibles need 4 to 6 hours of sunlight. Regardless of the size of the growing area, sun exposure is essential. Leafy crops such as lettuce and chard require at least 4 hours of sun per day and fruiting crops like tomatoes, melons, and beans need at least 6 hours of sunlight daily. It’s important to choose the sunniest spot on a deck or patio for an edible garden area.
Water – Container plants need water more often than those grown in the ground. The need to transport water to growing plants with buckets or watering cans can diminish the pleasure in growing edibles. While drip irrigation is ideal, a hose attached to a water source will suffice.
Containers – The possibilities for garden containers are numerous and range from commercial pots, planters, troughs, and bags to the creative repurposing of old pans and buckets, wooden crates, wheelbarrows, and, of course, wine barrels. A used filing cabinet with the drawers removed can make a great container for edibles. In the Demo Garden, a straw bale provides a patio container for yellow fin squash. Regardless of the type of container, good drainage is important so it may be necessary to drill holes to allow water to flow through easily.
Containers need to be deep enough to provide sufficient space for root growth. Depth requirements vary with the type of crop. Salad greens and some herbs can grow in 6- to 10-inch-deep containers while peas, eggplant, and peppers need at least 14 to 16 inches to develop a strong root system. Tomatoes in containers require a minimum soil depth of 18 inches.
Soil – The potting mix used in containers should be porous and fast draining, yet moisture retentive. A high-quality mix that contains compost and other organic matter is best. Garden soil is too heavy, difficult to keep evenly moist, and can harbor disease. Organic fertilizers should be added in frequent but light amounts as the watering that container plants require leaches nutrients from the soil.
Additional tips for small space edible gardening
Credit: PickPik
Take advantage of vertical space – Trellises and stakes help tall and vining plants to grow upward. Use walls or fences as additional planting space by adding shelves, racks, or hanging baskets. A recycled step ladder is an inexpensive vertical gardening option.
Avoid damage to structures – Use blocks or bricks under containers to prevent rotting wooden decks or stairs. Consider the weight of the soil and container when planting on a balcony.
Protect against animals and pests – Plants in containers are susceptible to the same pests as in-ground plants. Cages or netting might be necessary to protect against birds, squirrels, and other critters.
Don’t forget the pollinators – Adding a few flowering plants to a container garden can help to attract pollinators to the edibles and increase veggie and fruit production.
Click here for more information on growing edibles in containers.
February 2025: Choosing the Right Garden Tools
In January, the 2025 Marin Master Gardener training class was welcomed into the Edible Demonstration Garden for a discussion and demonstration on the use and care of garden tools. The right tools make the difference between gardening that is pleasurable and gardening that is a struggle. Your first experience with a garden tool might have been that pointed stick you used when digging in the dirt as a child. Now as a gardener, you are presented with an array of better tool choices, some essential for basic garden work and some designed for specific tasks. There are tools for pruning, tools for digging, tools for raking, and tools to make gardening easier. Here are some of the more popular tools in those categories.
Pruning Tools
Hand pruners are the favorite tool for most home gardeners. They are the tools used most often for cutting and thinning small branches to maintain plant health and appearance. They are also used for cutting flowers and harvesting vegetables. By-pass pruners, which work like scissors, are best for making clean cuts on living plants. Anvil pruners crush branch tissue and are good for removing and cutting up dead branches.
- Pruning saws are used to remove branches larger than what hand pruners can remove. They can have a fixed or folding blade.
- Loppers are long-handled by-pass pruners that can help access higher and hard to reach branches. The long handles also provide leverage to enable pruning thicker branches.
Digging Tools
Trowels are essential for digging, planting, potting, and weeding. A trowel is a spade-shaped hand tool with a slightly scooped blade.
- Garden knives are a type of trowel with a sharp narrow blade and a pointed end. One blade edge is usually serrated. Hori-Hori garden knives are a Japanese design that has proven to be so useful for digging and weeding that the name is often applied to any type of garden knife.
- Shovels and spades are long-handled digging and soil lifting tools with the shape of blade and the length of the handle determining their particular uses.
Raking Tools
- Rakes are useful for cleaning up leaves, removing debris, and spreading out soil amendments like compost and mulch. Hand rakes are great for getting into small spaces. Rakes with flexible, fan-shaped tines work well for cleaning up lighter debris and are sometimes called leaf rakes. Garden rakes have larger stiff metal tines and are intended for heavier use in soil or larger debris.
- Forks are used for raking out stones and weeds. Like a dinner fork, a garden fork has four strong tines which can push easily into the ground and enable it to double as a digging tool for loosening and turning over the soil.
Gardening Comfort Tools
Gloves provide the hand protection every gardener needs. They are a barrier against pricks, cuts, abrasions, blisters, insect bites, and other skin irritations. While most gardeners don’t mind getting their hands dirty, getting jabbed with a nasty thorn is not only painful, but it can also lead to serious infections. There are many types of gloves to choose from depending on the type of protection required. Most important is that they fit well and are comfortable to wear.
- Kneelers cushions protect the knees when planting, weeding, and performing other low to ground garden tasks. Kneelers made of rectangular shaped heavy foam are the simplest type. However, kneelers with handles that are lightweight and easy to fold up can make the up and down movements around the garden easier. Some even flip over to form a bench.
- Ergonomically modified tools can help gardeners get more done with less effort by enabling good body alignment and reducing joint strain. Grips should be comfortable to hold and keep hands and wrists in natural positions. Handles should be the right length to enable good posture without excessive bending and twisting.
Tool Care
Tools need to be kept clean, sharpened, in good repair, and organized to keep them working well. Surface dirt and dried sap should be brushed or washed off after each use. Periodically applying a light layer of oil will reduce rust. Pruners need regular sharpening and should be sanitized with a 10% bleach solution following contact with diseased plant material. Storing tools in dry place where they can be easily accessed will ensure they are ready for work when you are.
Click here to learn more about choosing and caring for garden tools.